
Disclaimers can be customized for Customer Documents, in EverLogic. To add a disclaimer, first make sure disclaimers are enabled.
NOTE: The procedure for adding a Rental Disclaimer is different, please contact EverLogic Support for guidance.
VIDEO: Watch video timeline 2:36 – 3:42.
Determine if Disclaimers are Enabled
1. Navigate to the System Setup Tab and select System Rules
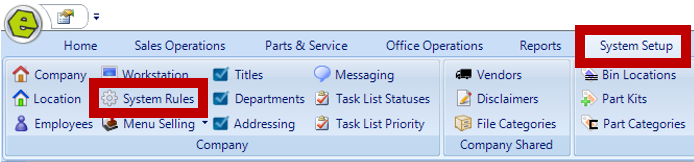
2. Locate the DisclaimerRcpt Rule
-
- Rule Answer 1 - EverLogic will add disclaimers to your documents
- Rule Answer 0 - EverLogic will NOT add disclaimers to your documents
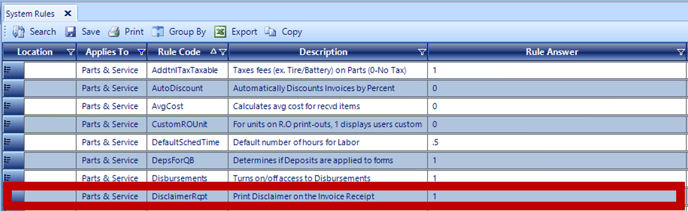
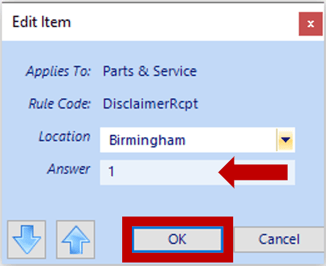
3. Double click the line item to edit
4. Select the Location
5. Key the desired Answer
6. Click OK
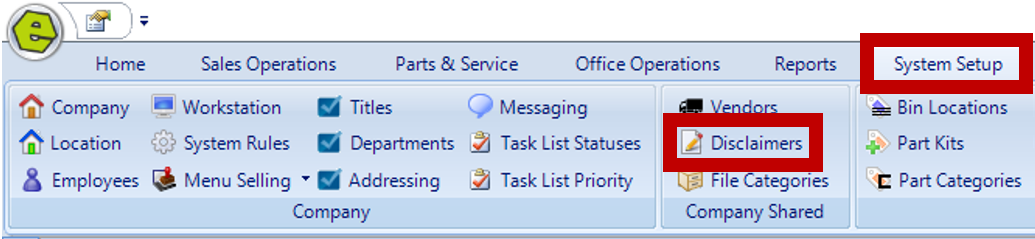
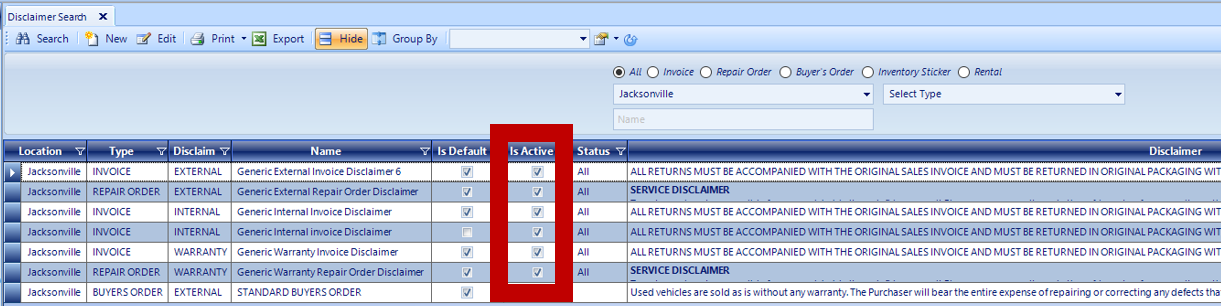
Edit Disclaimers
1. Navigate to the System Setup Tab and select Disclaimers
2. Select search parameters and click Search

3. Determine if the Disclaimer "Is Active"
4. Double-click the line item to edit Disclaimer
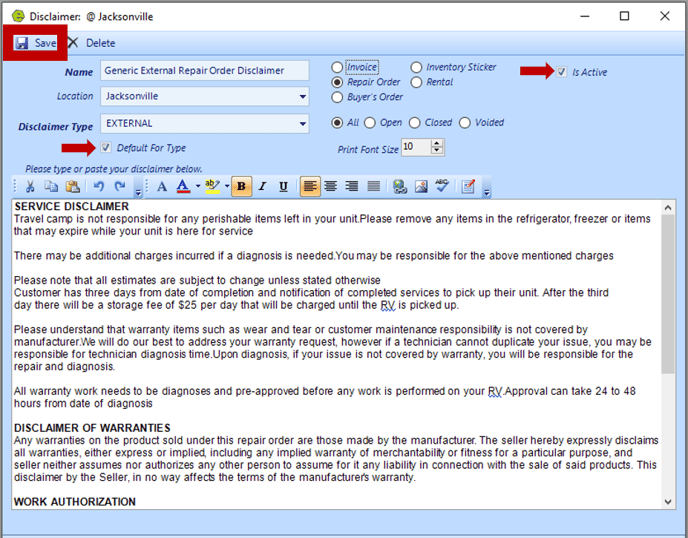
Add Disclaimers
1. Click New

2. Key the Name of the disclaimer
3. Assign a Location
4. Select the Disclaimer Type (Clarification: A retail invoice is an External type of disclaimer.)
5. Choose a Category
6. Mark the "Is Active" Button
7. Check the Default For Type Box to set the disclaimer to print by default
8. Key or paste your disclaimer verbiage
NOTE: The disclaimer can be 20 rows long without creating onto a second page, as long as the font remains 10 point, which is the default. The HTML formatting tools are not currently available in EverLogic.
9. Save
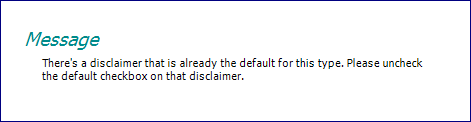
Warning Message: The Message below will display if there is another disclaimer of the same type, ie another external invoice, and it is the default, uncheck the Default For Type Box on the other disclaimer prior to selecting Default For Type Box on the new disclaimer.
NOTE: The procedure for adding a Rental Disclaimer is different, please contact EverLogic Support for guidance.