Adding the Printer
1. Attach the power supply to the back of the printer
2. Attach a printer cable from the OkiData Printer to your computer
3. Turn the printer on
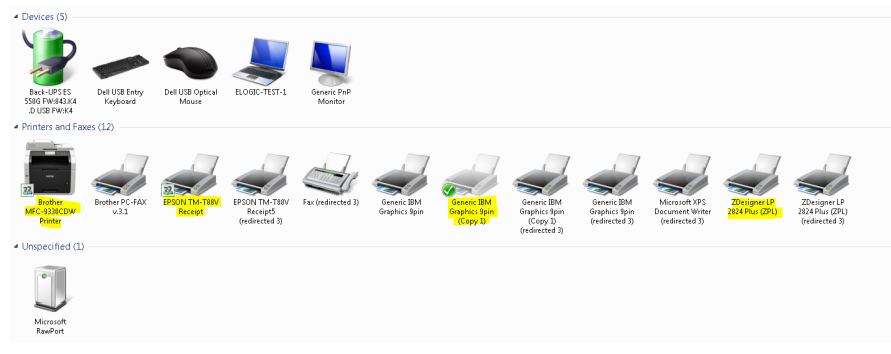
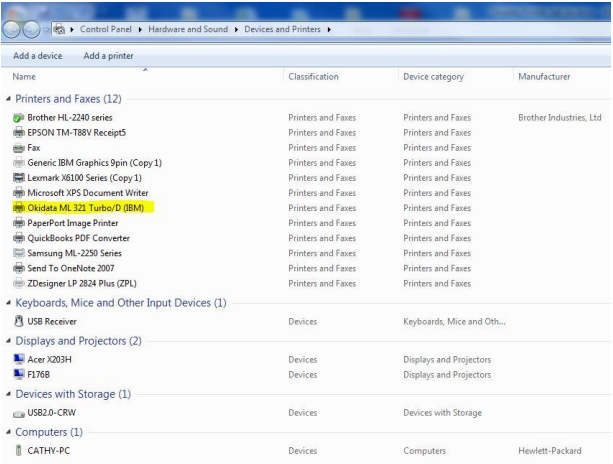
Windows will automatically install and attach the OkiData Driver. When you receive the message "Your device is ready to use", you should see the OkiData ML 321 Turbo D in the Printers and Faxes Folder.

Attaching the Driver
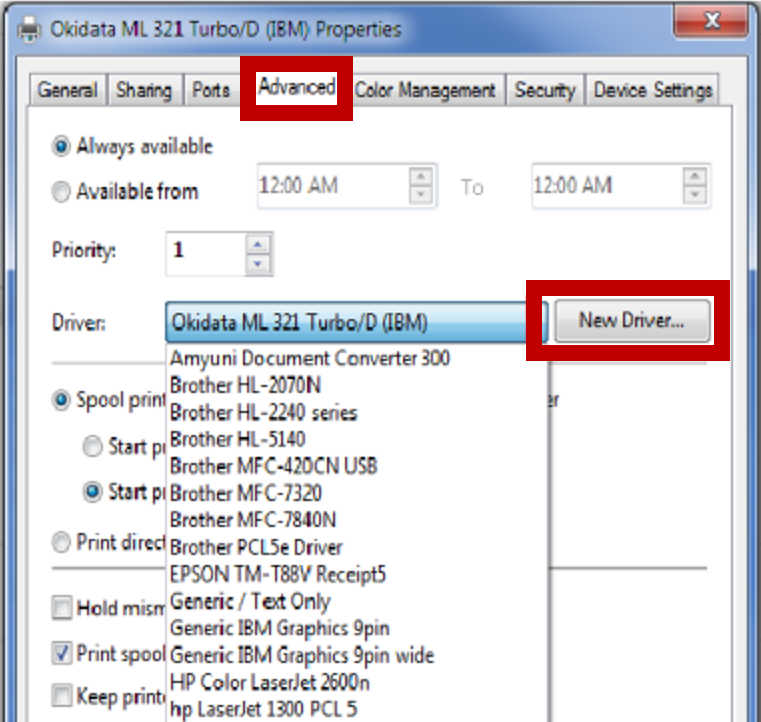
1. Right-click on the printer and select Printer Properties
2. Access the Advanced Tab
3. Select the Generic IBM Graphics 9-pin from the drop-down list
4. Click Apply and OK
NOTE: If Generic IBM Graphics 9-pin is not in the list, add New Driver using the Wizard, directions to follow.
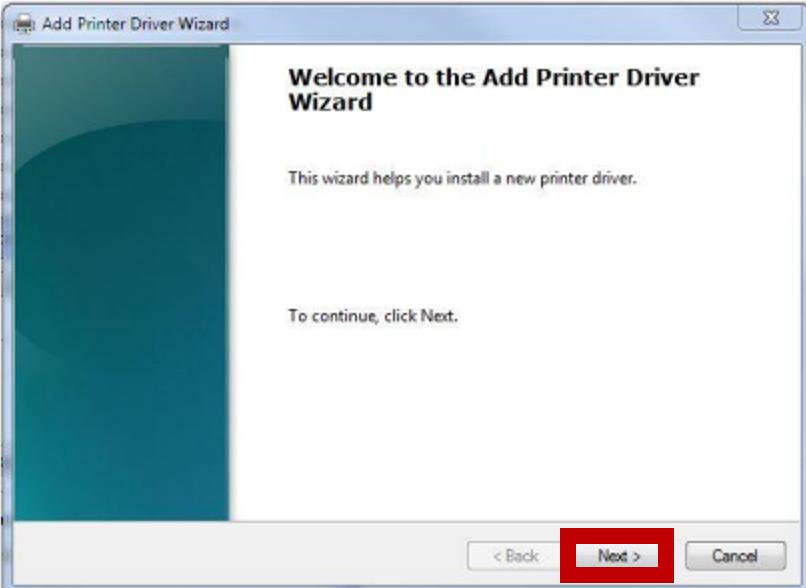
Adding Driver using the Wizard
1. Click the New Driver Button

2. Click Next
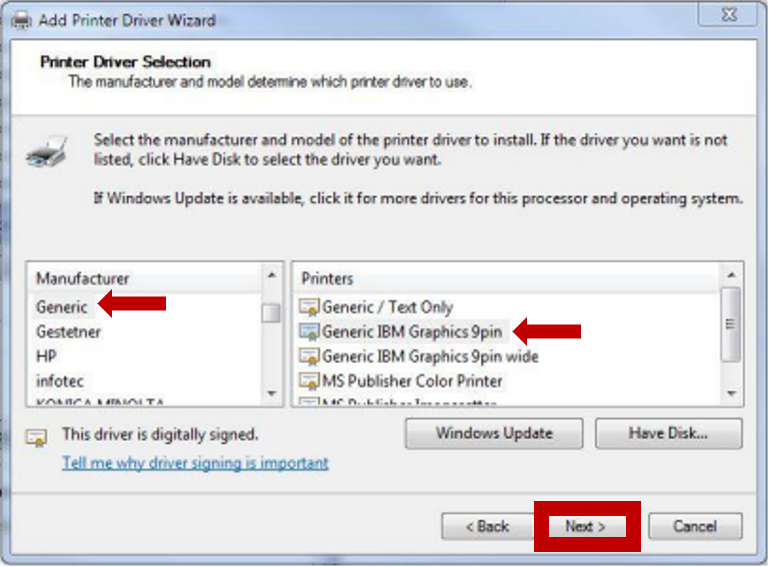
3. Select Generic in the Manufacturer Column
4. Select Generic IBM Graphics 9pin in the Printers Column
5. Click Next
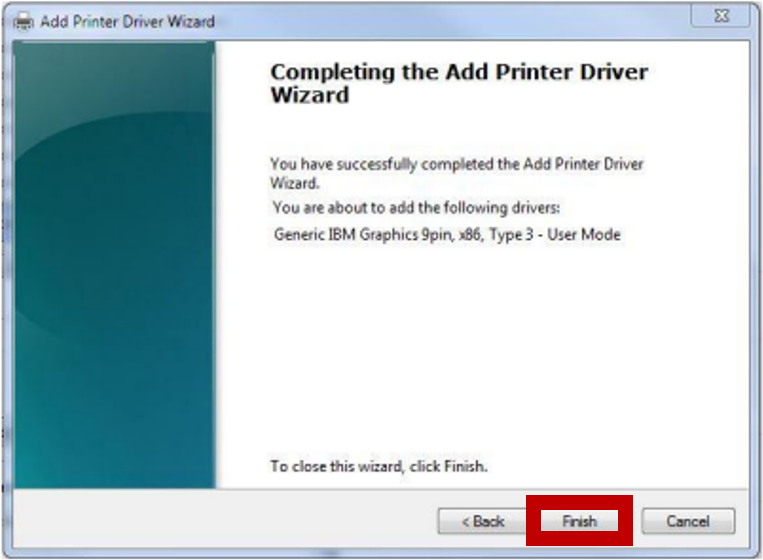
6. Click Finish
Creating New Form Length
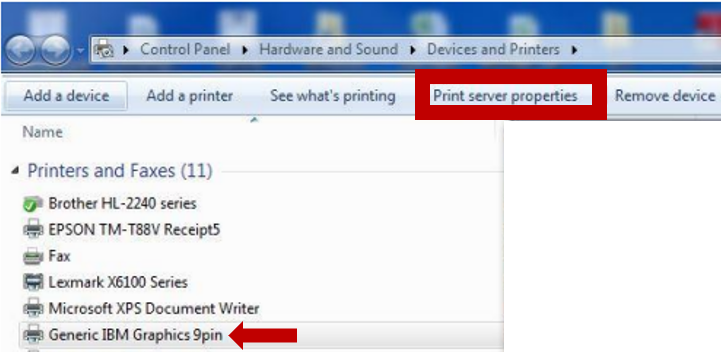
1. Select your OkiData printer. It may now be named Generic IBM Graphics 9pin or Okidata ML320 Turbo/1.
2. Click Print server properties
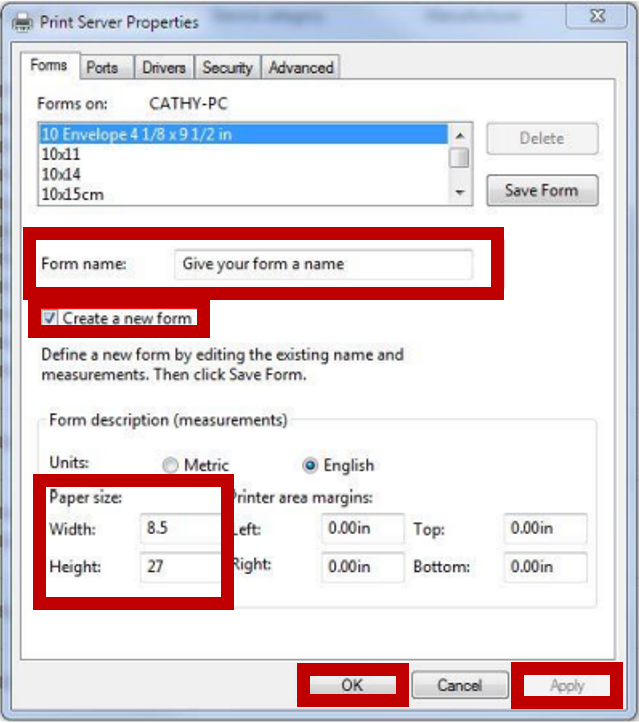
3. Select Create a new form
4. Key the the form a name (I use EverLogic)
5. Change the Width to 8.5 and Height to 27
6. Save
7. Click Apply, then OK
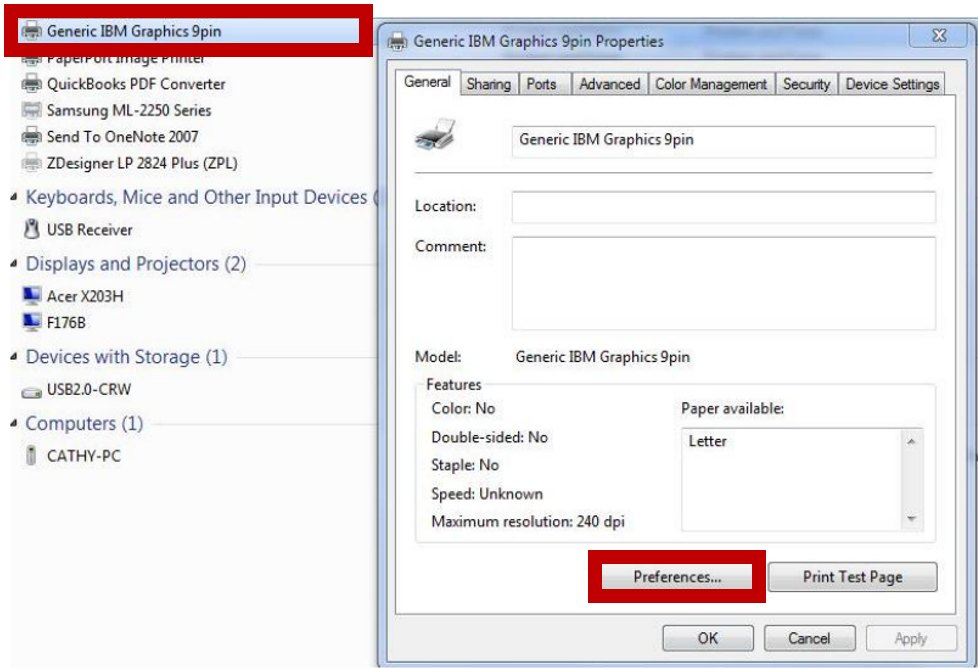
Default the Paper Size
1. Access Printers and Faxes
2. Right-click on OkiData printer
3. Select Preferences
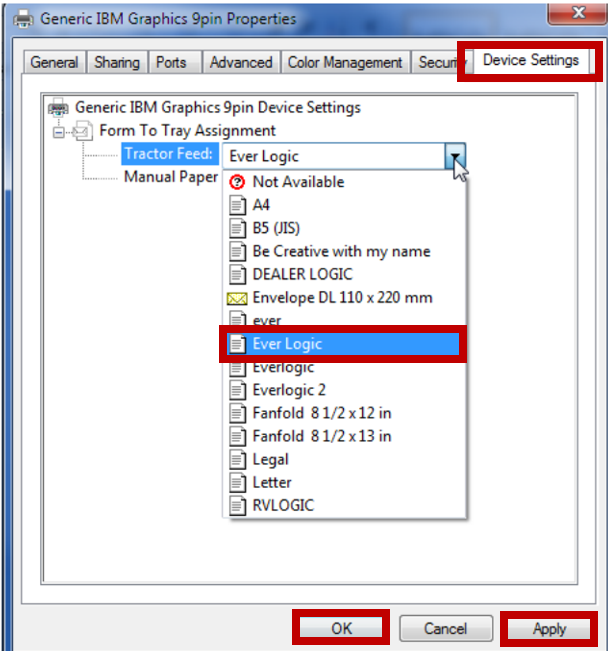
4. Access the Device Settings Tab
5. Select the new form you created under BOTH Tractor Feed and Manual Paper
6. Click Apply
7. Click OK
Workstation Defaults
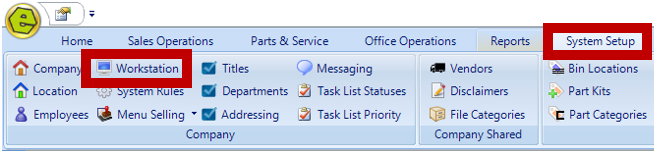
1. Navigate to the System Setup Tab and select Workstation
2. Click the This Workstation Button

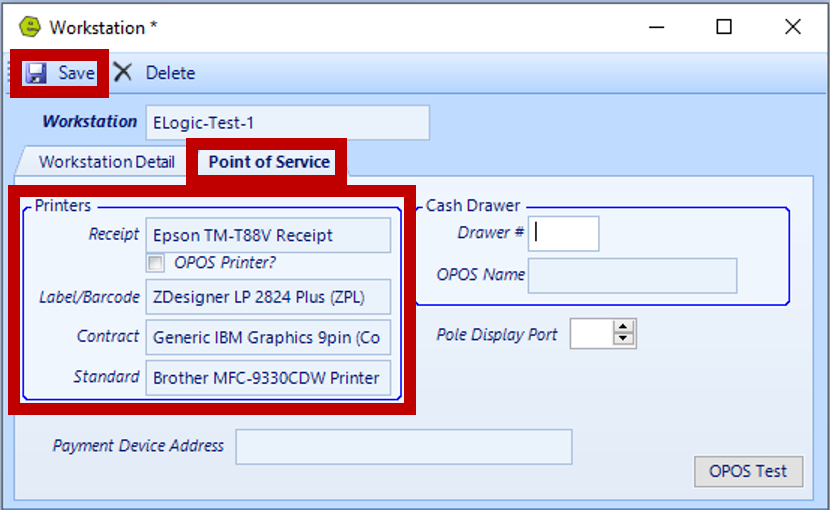
3. Access the Point of Service Tab
4. Key the Printer Names making sure the Generic IBM 9pin is put into the Contract field.
IMPORTANT: The names MUST match exactly. If your Printer is named Okidata ML320 Turbo/1 in your control panel, then that is what you must put instead.
5. Save
NOTE: If the setup is completed correctly, the device should no longer be listed as the Default Printer.