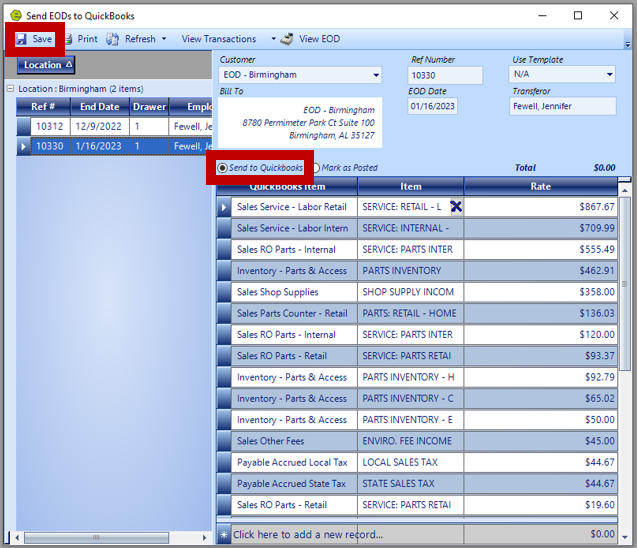
2. Double-click to see the EOD display on the right side and ensure all items show correctly, then click Save to send to QuickBooks.
NOTE: QuickBooks does not allow a zero or negative day, “Mark as Posted”, if you have a zero day or if you manually post the EOD to QuickBooks.
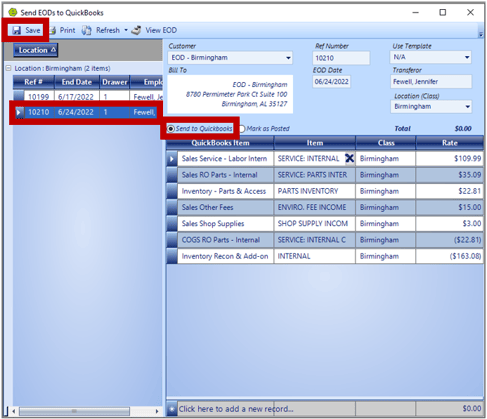
NOTE: View Transactions may show in orange, if there are open On-Accounts, Warranties, and Transactions with Deposits for you to view. If Transactions do not show in orange, then there are none to view and you can Save and send to QuickBooks.


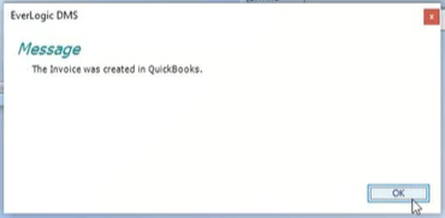
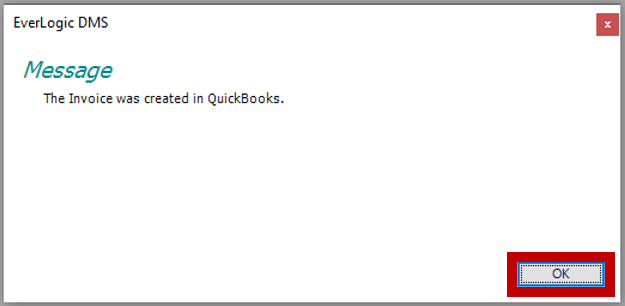
RESULT: You should receive a pop-up message indicating "The Invoice was created in QuickBooks".
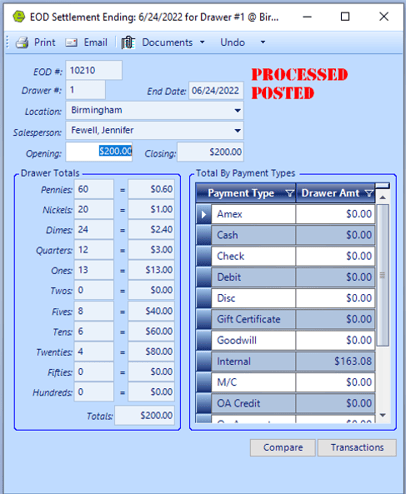
NOTE: The EOD Form will now show "Processed" and "Posted", in bold red letters.
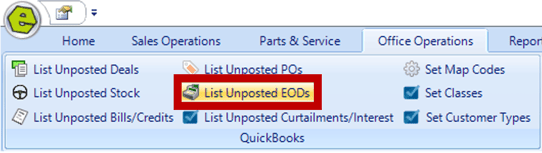
4. Navigate to the Office Operations Tab and select List Unposted EODs
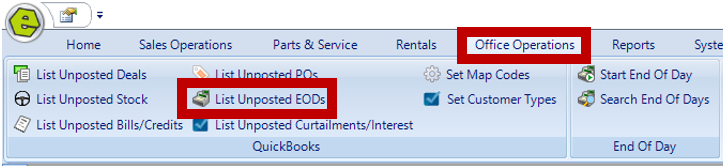
5. Locate EOD to be posted on the left side
6. Double-click to display information on the right side

7. Click View Transactions and select View Part Transactions, if the button flashes orange

RESULT: The Part Adjustment(s) to be sent to QuickBooks Window will display.

8. Check Send to QuickBooks
9. Save
IMPORTANT: ONLY select "Mark as Posted", if manually posting in QuickBooks.
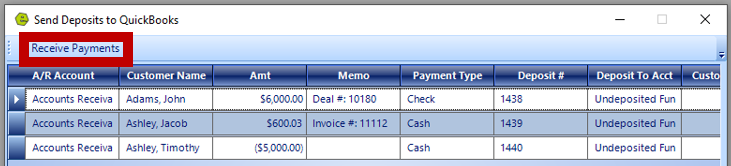
10. Click Receive Deposits Button
11. Click OK, when you receive the message below, "The Invoice was created in QuickBooks"
IMPORTANT: Be sure to receive all payments in QuickBooks, once received, they will be directed to Undeposited Funds, then, deposit them into the bank account in QuickBooks.