VIDEO: Watch video timeline 1:08 – 2:13.
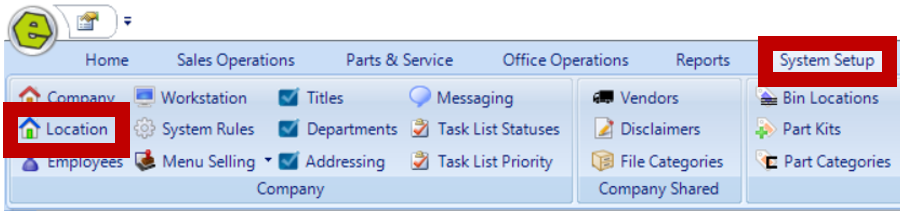
1. Navigate to the System Setup Tab and select Location
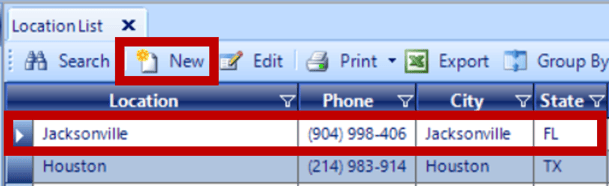
2. Select an existing Location or click New to add another Location
3. Access the Logo Tab
4. Browse to locate and select your Company Logo
5. Save
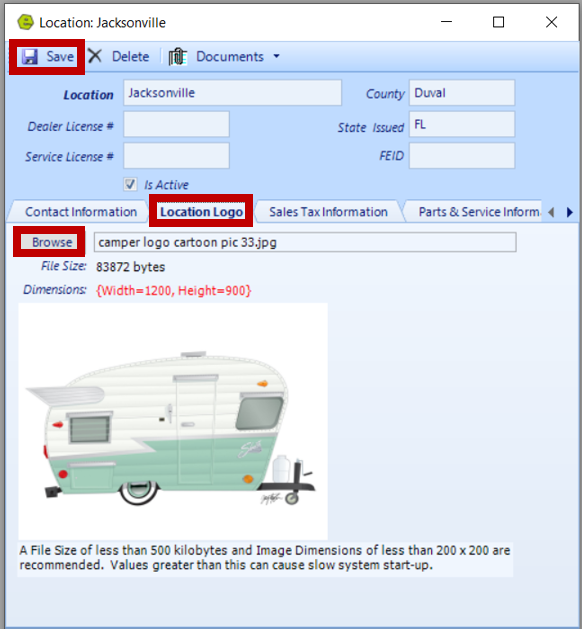
NOTE: You may have to modify the dimensions of the image to ensure it prints properly.
Related Article: