
Accepting consigned vehicles will require setting up a Vendor, the Consignor is the Vendor. It is recommended you complete this set-up prior to loading the unit into inventory. A Consigned Unit is not posted in QuickBooks until it is sold.
IMPORTANT: Do not post the Consigned Units in QuickBooks until it is sold.
Consignment Vendor Set-up
1. Navigate to the System Setup Tab and select Vendors
2. Click New
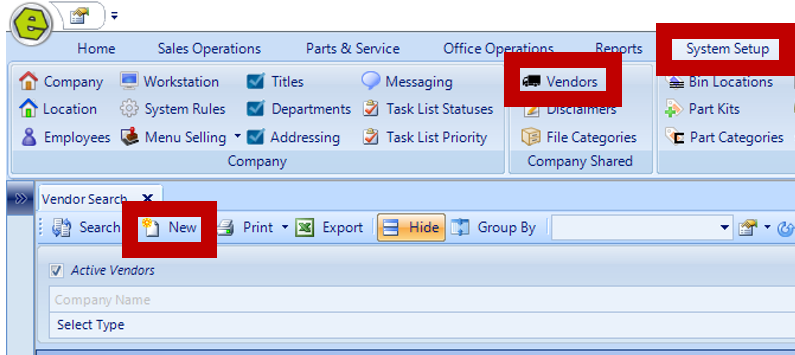
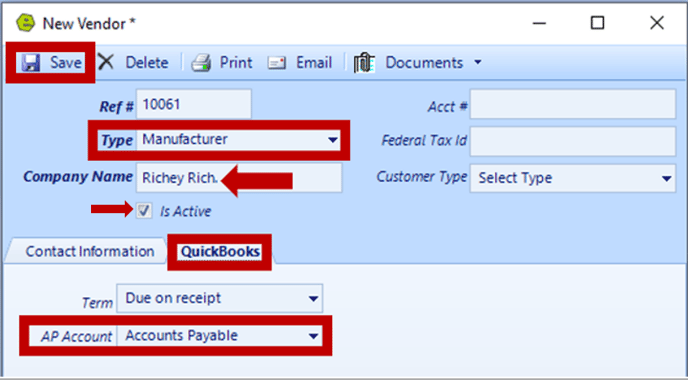
3. Select Manufacturer as the Type
4. Key the Consignor's Name as the Company Name
VERY IMPORTANT: If the Consignor is also a Customer, add a number or symbol to the Company Name, as QuickBooks will no accept a Customer and a Vendor with the same name.
5. Check the Is Active Box
6. Access the QuickBooks Tab and select Accounts Payable in the AP Account Field
7. Save
Consigned Unit Set-up
1. Navigate to the Sales Operations Tab and select New Inventory

2. Assign a Stock Number
3. Select Consignment as the Status
4. Mark as Used ( Mark as Demo, if you are tracking consignments separately in QuickBooks or if they are not to be included in Used Vehicle FlexViews.)
5. Key the unit details
6. Enter the name of the Consignor 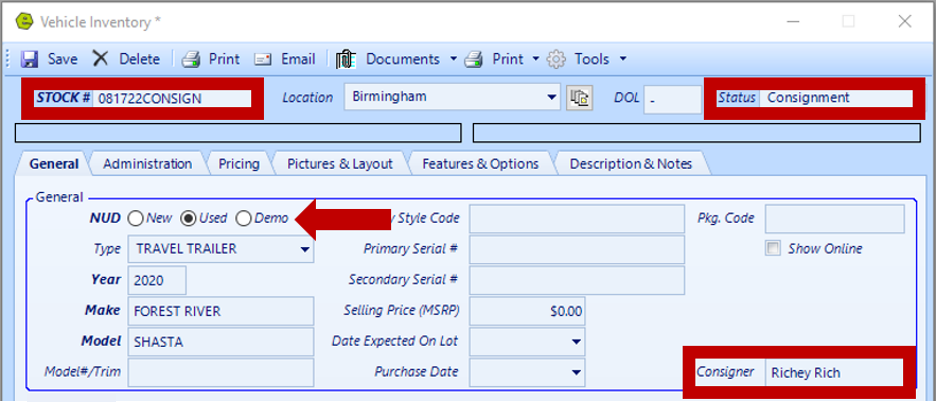
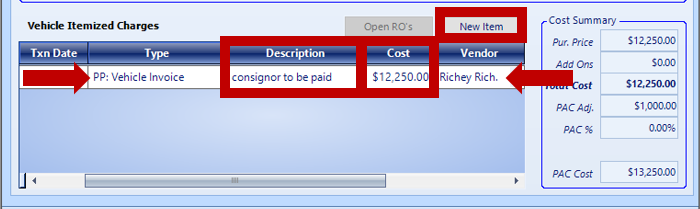
7. Click the New Item Button for the Vehicle Itemized Charges
NOTE: The Line Item will default to PP: Vehicle Invoice, Purchase Price".
8. Key a Description
9. Enter the Cost (This is the amount the Consignor will be paid, once the unit is sold.
This amount will be sent to A/P when it is posted.)
10. Save
**DO NOT POST THE UNIT IN QUICKBOOKS AT THIS TIME**
Post Sale of the Consigned Unit
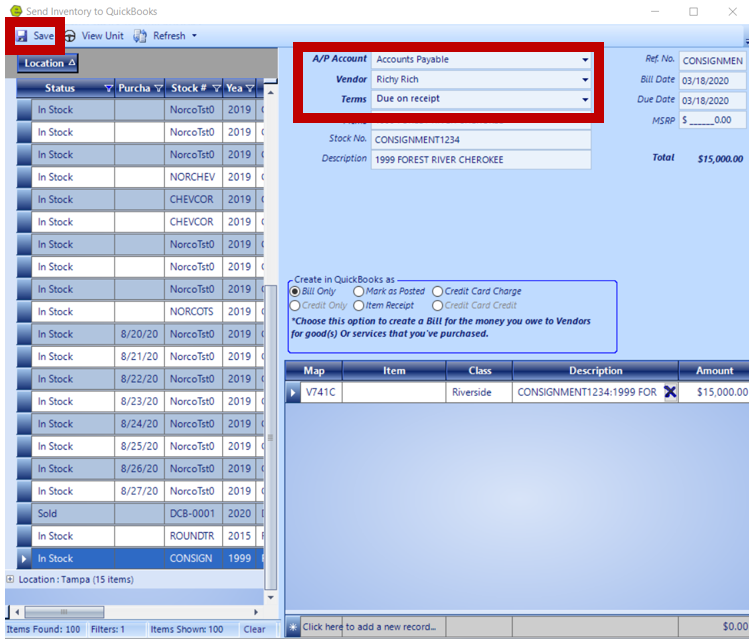
1. Navigate to the Office Operations Tab and select List Unposted Stock

2. Filter the Status Column and select Consignment

3. Select Accounts Payable in the A/P Account Field
4. Select For the Consignor's Name as the Vendor
5. Select Due on Receipt as the Terms
6. Save
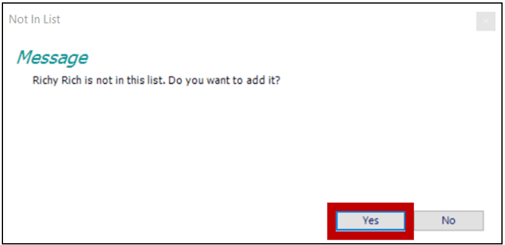
NOTE: If the Consignor is not in QuickBooks, a prompt will appear to add them to the list, click yes.
REMINDER: Consigned Units are not posted in QuickBooks until it is sold.
NOTE: If the Customer is going to pay for Repair Order items, in order for the unit to sell and the amount will be taken out of the Customer proceeds, it would be best practice to cash-out the Repair Order as "on account", then handle it in QuickBooks as a receivable to offset the amount paid to the Customer.
Related Article: