Paper size to 30336 1 in x 2-1/8 in.
NOTE: Paper size to 30336 1 in x 2-1/8 in.
Installation Steps
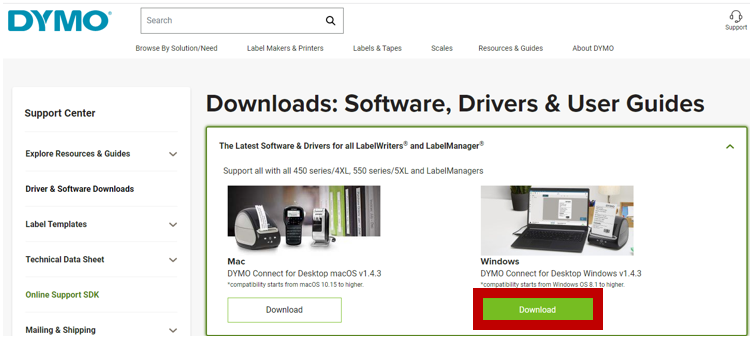
- Access dymo.com
- Go to Resources & Guides
- Select Downloads & User Guides
 Click "The Latest Software for all INV0239 and LabelManager
 Download the Windows Version
 Select English
- Install (may need Microsoft Ace 2010 installed here, allow it to be installed)
- Click Next
- Accept Terms
- Click Next
- Click Complete
- Click Next
- Install
- Finish
Configure Steps
- Connect printer to computer
- Access Control Panel
- Choose Hardware and Sound
- Go to View devices and printers
- Go to Printers and Scanners
- Click the printer name
- Open printer properties
- Access the Advanced Tab
- Select Printing Defaults
- Change Orientation to Landscape
- Click Advanced
- Change paper size to 30336 1 in x 2-1/8 in
- Click OK
- Click Apply
- Click OK
- Document the printer name for the upcoming Steps
NOTE: If the orientation is not printing correctly, go to printing preferences and confirm orientation is set to landscape.
Add printer to the workstation in EverLogic.
1. Navigate to the System Setup Tab and select Workstation

2. Click the button for This Workstation

3. Access the Point of Service Tab
4. Key the name of the printer in the Label / Barcode Field, from Step 16 in the previous section
5. Save

Test Printer
1. Access the Parts & Service Tab

2. Click Search and Open a part

3. Click Barcodes and select "With Selling Price"

4. Click OK

ATTENTION: May need to adjust the LabelMargin System Rule.
5. Navigate to the System Setup Tab and select System Rules

6. Locate LabelMargin System Rule

7. Adjust the Answer, usually between .1 - .4 works best

8. Save

8. Complete logout of EverLogic and back in to run another test, continue to adjust LabelMargin System Rule as necessary
Related Articles:
Equipment Supported by EverLogic
