VIDEO: Watch video timeline 32:50 - 33:28.
3. Complete the New Employee Form User Properties Form
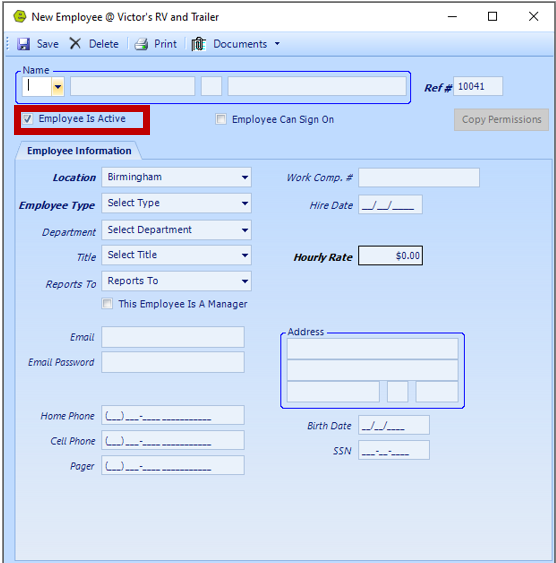
REMINDER: Be sure to Check the "Employee Is Active" Box.
4. Click the "Employee Can Sign On" Box
RESULT: The User Information Tab will appear, along with the Multi-Factor Authentication Section.
5. Select the Location and Employee Type
6. Check the box if This Employee is a Manager
NOTE: If this box is checked, the person will reflect as the Sales Manager when opening a New Quote Form. If the box is not checked, the person in the Reports to Field will reflect as the Sales Manager when opening a New Quote Form.
IMPORTANT: The User needs to be marked as a Manager to be able to reopen Invoices.
7. Complete the Multi-Factor Authentication Section
NOTE: Click the box for "Same as Email?", if you want to use the email in the Email Field, make sure you have access to this email.
NOTE: Click the box for "Same as Cell Phone?", if you want to use the number in the Cell Phone Field. Make sure to have this phone with you when you log in.

8. Access the User Information Tab
9. Create a Login and Password
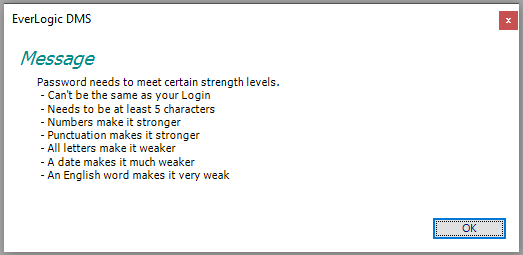
10. Click the blue Information Circle to see the Password Criteria
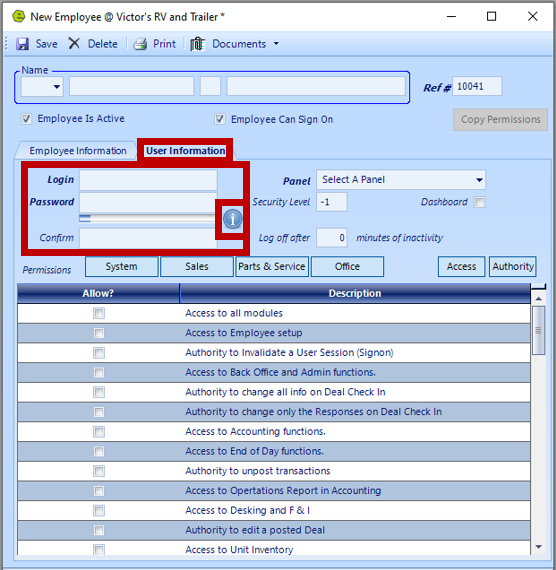
11. Select a Panel that will display on the left of EverLogic, for quick access
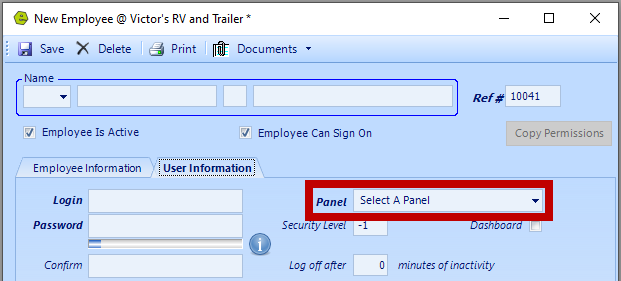
12. Assign a Security Level (reference viewing scanned documents)
-
- -1 for minimal access - assigned to scanned documents that do not show Personal Identifiable Information
- 0 for all access - assigned to scanned documents that show Personal Identifiable Information; Customer phone number, social security number or address, found on driver's license or ID Card
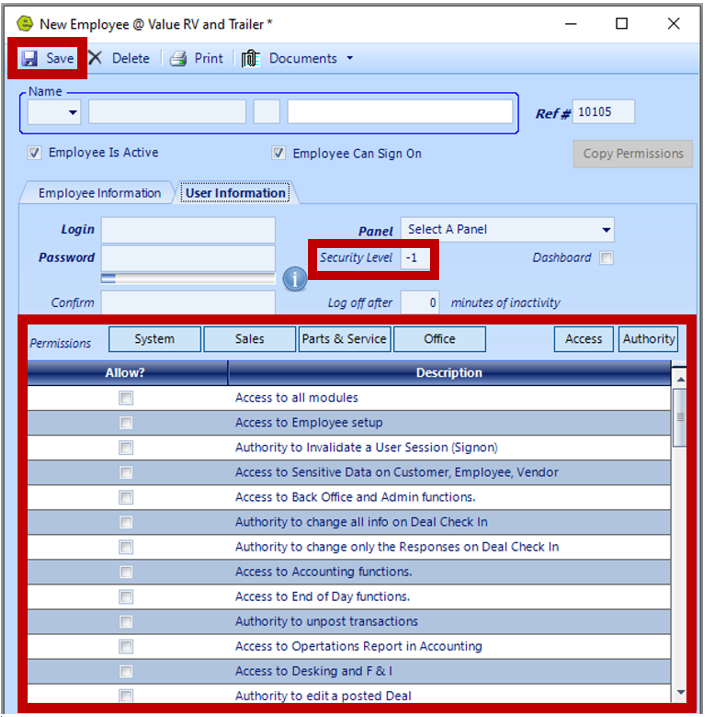
13. Select the Permissions to be assigned to the employee
NOTE: Refer to the article for "Employee Access & Authority Defined" to help you determine the permissions items to enable for different types of employee.
14. Click Save
15. Logout of EverLogic before the Employee attempts to login
16. Instruct the employee to update their password by selecting My Profile on the Home Tab
Related Articles:
EverLogic Mobile App Permissions
Employee Access & Authority Defined