
EverLogic makes it easy to turn a Quote into a Deal.
IMPORTANT: It is best practice NOT to open a new Internal Repair Orders on a newly sold unit, until the deal is washed & posted.
Navigate to Sales Operations and click New Quote.

Deal Information Tab
The primary details of the Quote / Deal are located on the Deal Information Tab.
1. Click the Magnifying Glass Icon to search Customer
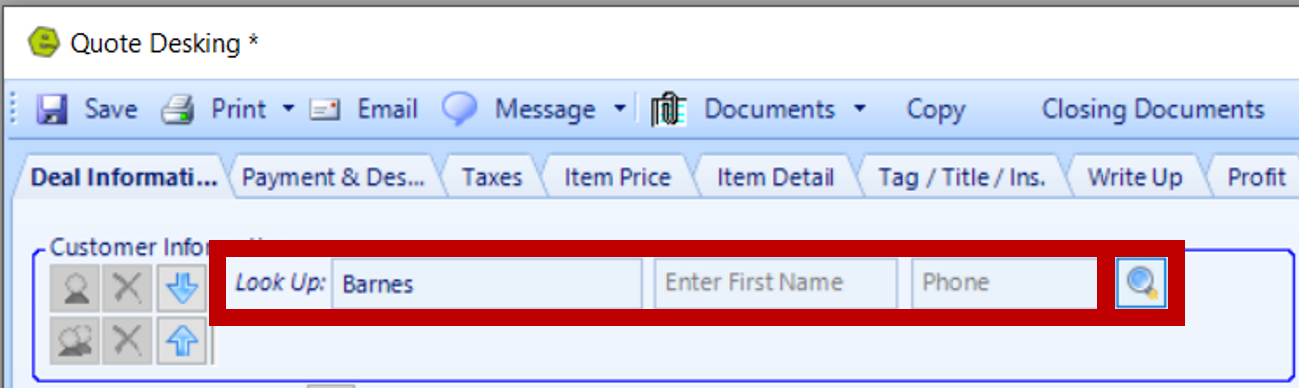
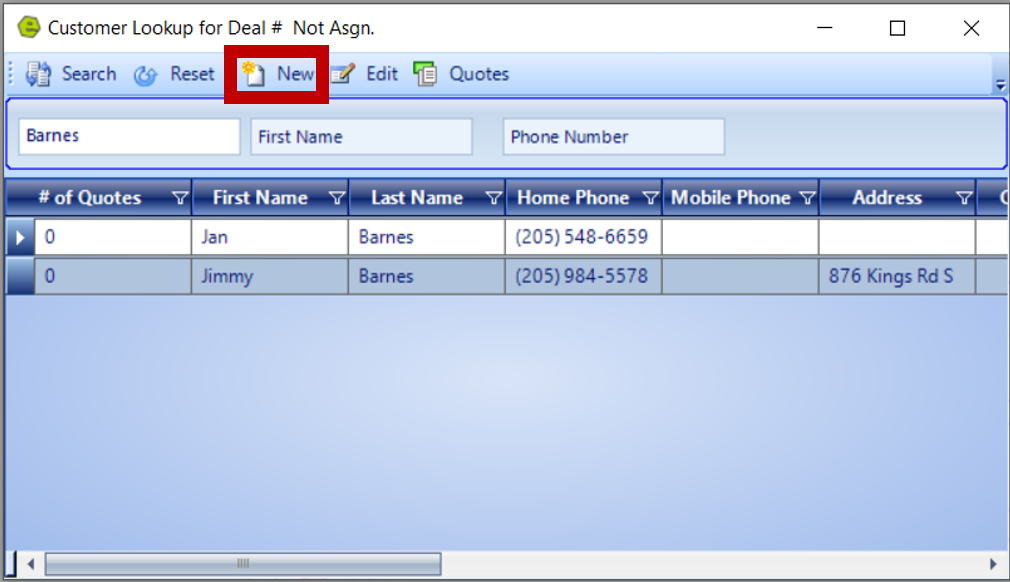
2. Search and double-click to select an existing Customer in the search window, or click New to add a new Customer
NOTE: The Customer and Co-Customer, AKA "Association", will display. The positioning of the names can be changed, by clicking on the blue up and down arrows, to represent the person with the best credit rating on top.

3. Click Save
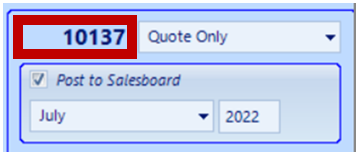
NOTE: The Quote / Deal Number will appear in the upper-right corner, along with the Status, which will automatically show as "Quote Only". Click to select "Post to Salesboard" and enter the month and year.
4. Type the Vehicle Stock Number and click the Magnifying Glass Icon to search Vehicle Inventory
NOTE: If there are multiple units with similar Stock Numbers, double-click the unit in the search window, otherwise, the unit will display with selling price.


NOTE: Click the Plus Icon to add another unit / vehicle to the Deal. A new Inventory Tab will appear, allowing multiple units / vehicles to be added to the Deal.


5. Add Trades
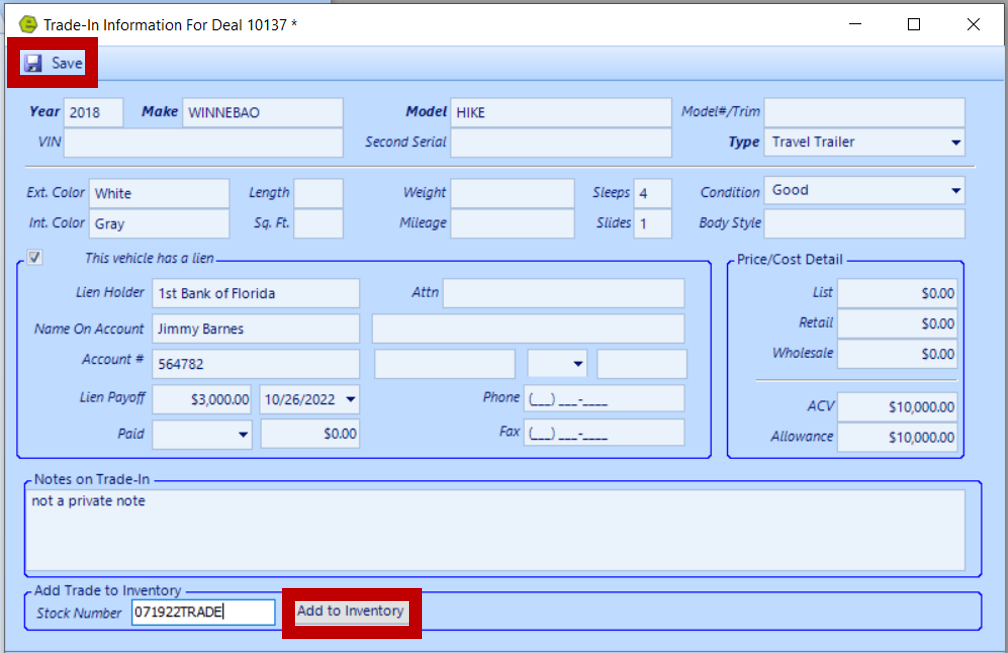
NOTE: There are three trade lines available. Add trade details by clicking the Car Icon and complete the Trade Form; shown below.

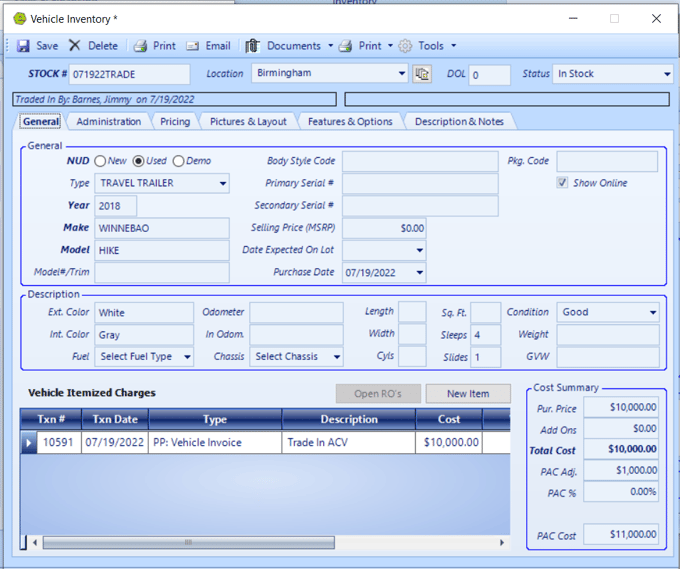
IMPORTANT: Key as many details, as necessary, bolded fields are required. If you wish to add this trade to inventory, key the trade vehicle a Stock Number and click Add to Inventory Button. If not, the trade can be added to inventory, during Profit Accounting. The ACV is not required at this point, however, are required to close, "Wash", the Deal. It is recommend to key the ACV, at this point, to avoid time delays, as the Deal progresses.
6. Save
NOTE: If you chose to add the trade to inventory, the Vehicle Inventory Form for the trade will display, add additional detail, if necessary, then Save.
Hover over the Trade to confirm the ACV Amount displays. This amount will be required to "Wash" the Deal.
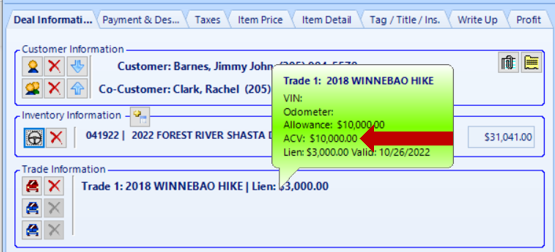
NOTE: The Trade Allowance and Trade Payoff amounts will display on the right-side Accounting Panel. These fields cannot be manipulated, as they account for up to three trades, allowed on a quote / deal.


7. EverLogic will auto-populate the bolded items in the Deal Information Section
NOTE: The Sales Manager can override and assign the Salesperson, double-click the Poach Lock and complete the Override. The Poach Lock System Rule can be turned off.

8. Include the Reg County / State, where the RV unit will be registered, click green arrow to auto-populate
![]()
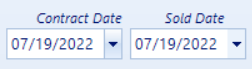
9. Select Contract and Sold Dates; the Contract Date will be counted as the sale date in QuickBooks.
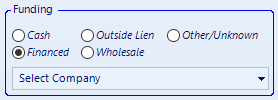
10. Complete Funding, it does not show as bolded here, however, it is required to “Wash" the Deal, it is recommended to complete this section, to avoid time delays, as the Deal progresses. The Cash option includes, cash, check and credit / debit cards.
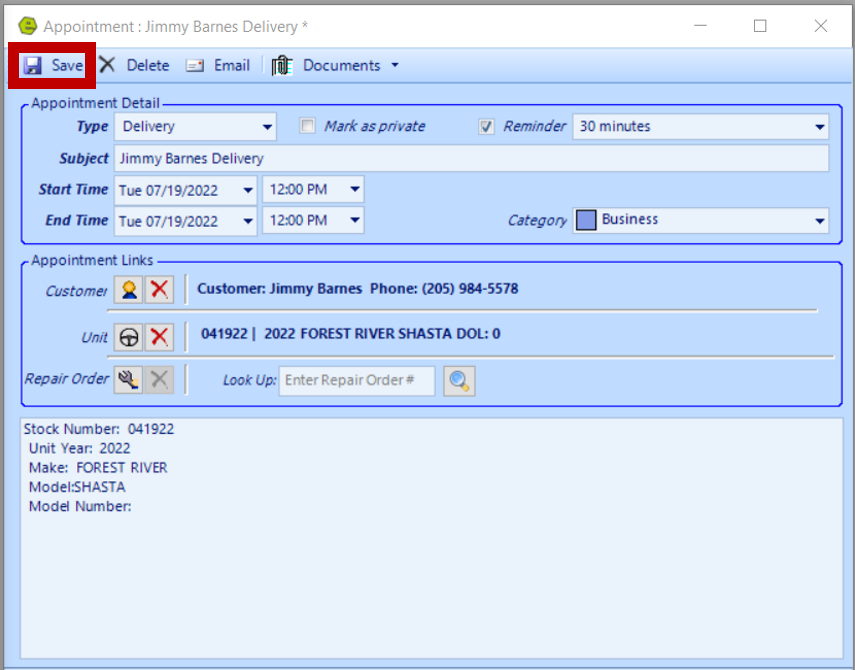
11. Check the Scheduled Delivery Box and click on the Calendar Icon to add the appointment to your calendar.
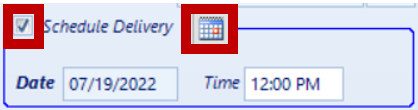
NOTE: Add necessary details to the Appointment Window. Click Save and close the window.
Payment & Details Tab
Details on the Payment & Details Tab can be set as default to automatically populate. Information on this tab will be added to the appropriate closing documents. The Green Arrow Button can be used to manipulate the Monthly Payment Amount.
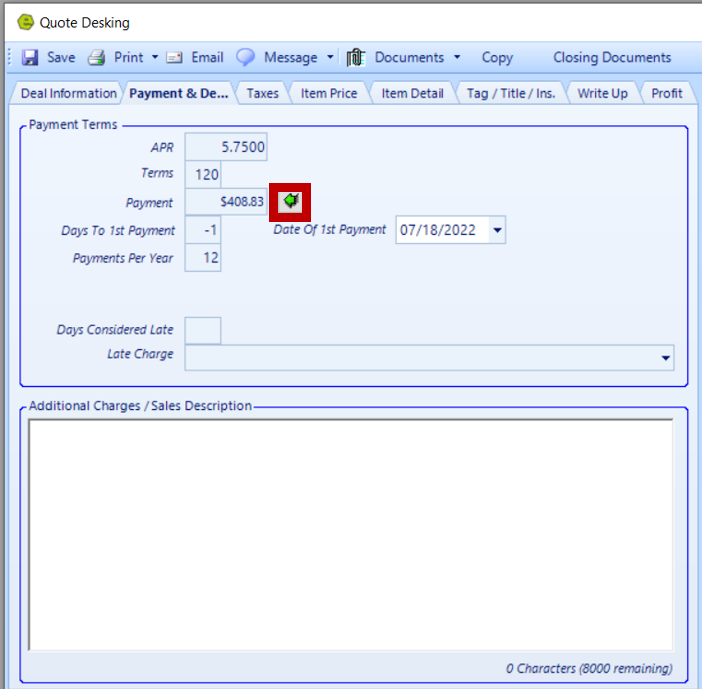
NOTE: Any text added to the Additional Charges / Sales Description will overwrite any items entered on the Write Up tab when the invoice prints.
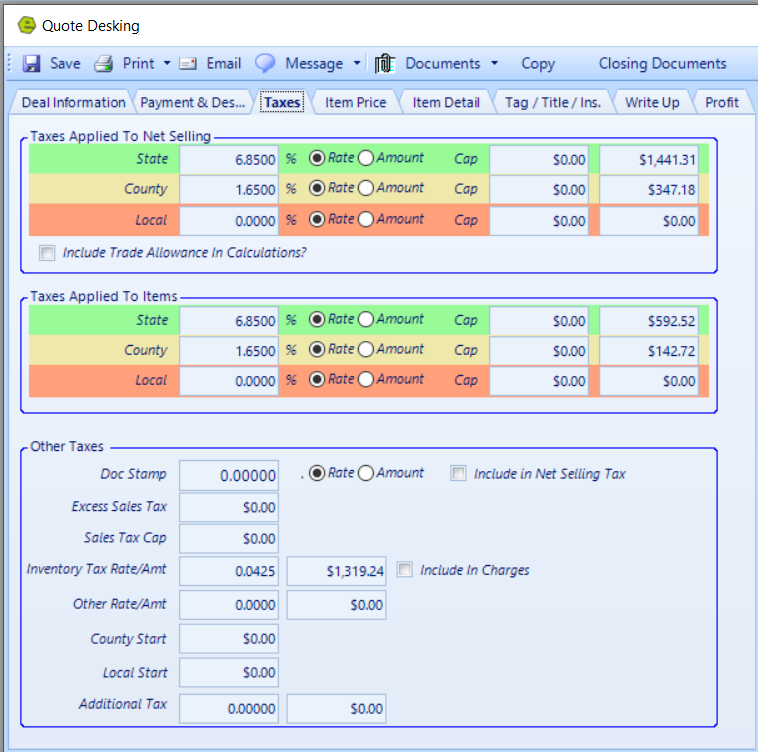
Taxes Tab
Tax Rates for deals can be set as default to automatically populate. Taxes can be set as a percentage or flat rate amount.
All financials will display on the right-side accounting panel on the Deal Information Tab.
IMPORTANT: The Down Payment is ONLY used for negotiation. Once the Quote turns into a Deal, the Down Payment becomes the Deposit and will need to be placed in the correct Field.

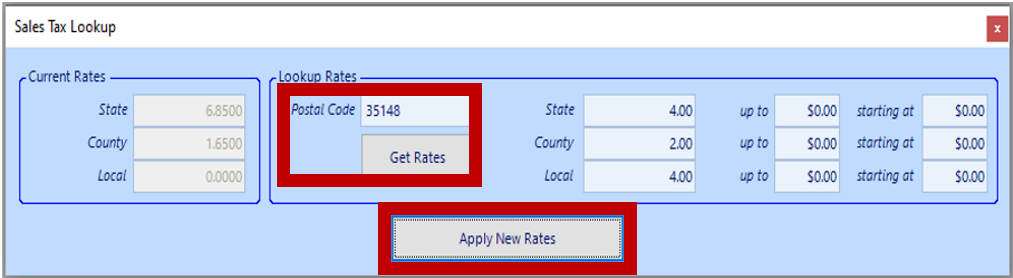
IMPORTANT: You can override the pre-set taxes, if this is an out of state deal and you don’t do reciprocity, click the Sales Tax Link, on the right-side accounting panel.

Key the zip code for state tax calculation and click Get Rates, then click Apply New Rates Button.
Item Price Tab
There are three fields, to reflect State, County and Local taxes, these amounts can be pre-set under Deal Defaults.
- Left Side: Additional fees charged by the state, such as Registration, Document Fees, Credit Card Convenience Fee, etc.
- Right Side: After Market Items, like Extended Warranty, Insurance, Road Guard, Exterior Treatment or Other Accessories.

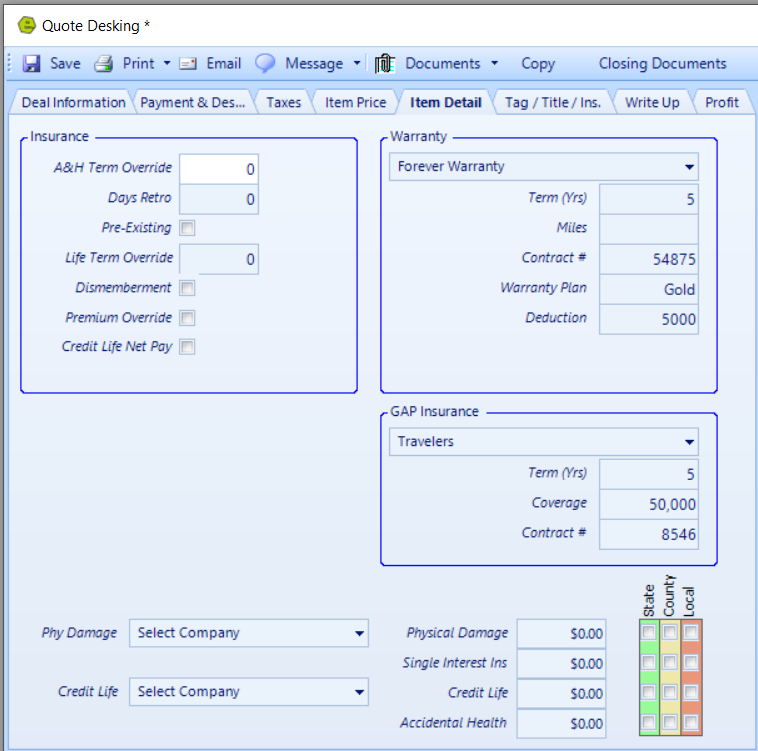
Item Detail Tab
Key detail for Insurance, Warranty, Gap Insurance and additional specifics, when available. Information on this tab will be added to the appropriate closing documents.
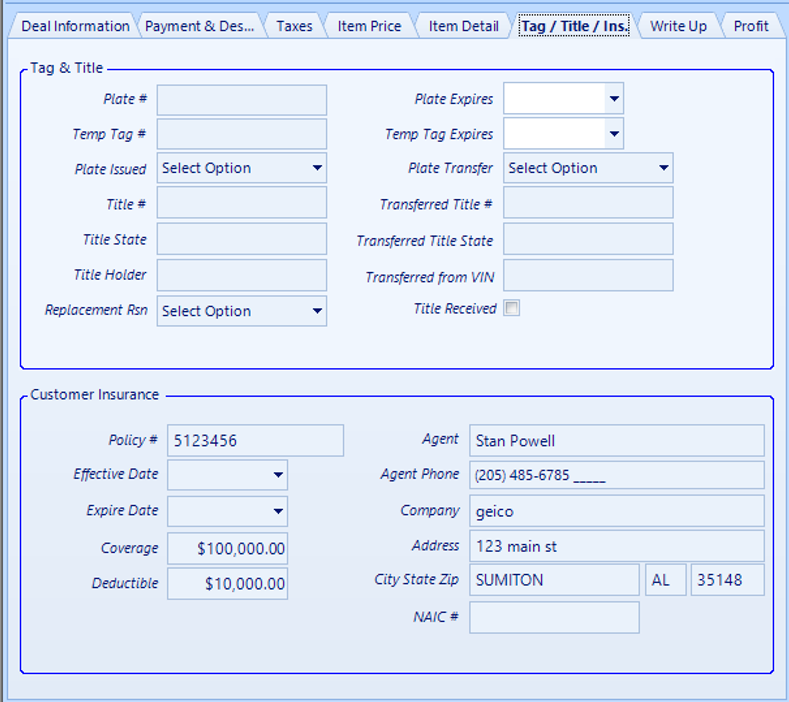
Tag / Title / Insurance Tab
Key Tag and Title, for the unit the Customer is buying. along with the Customer Insurance. Data on this tab will be added to the appropriate closing documents.
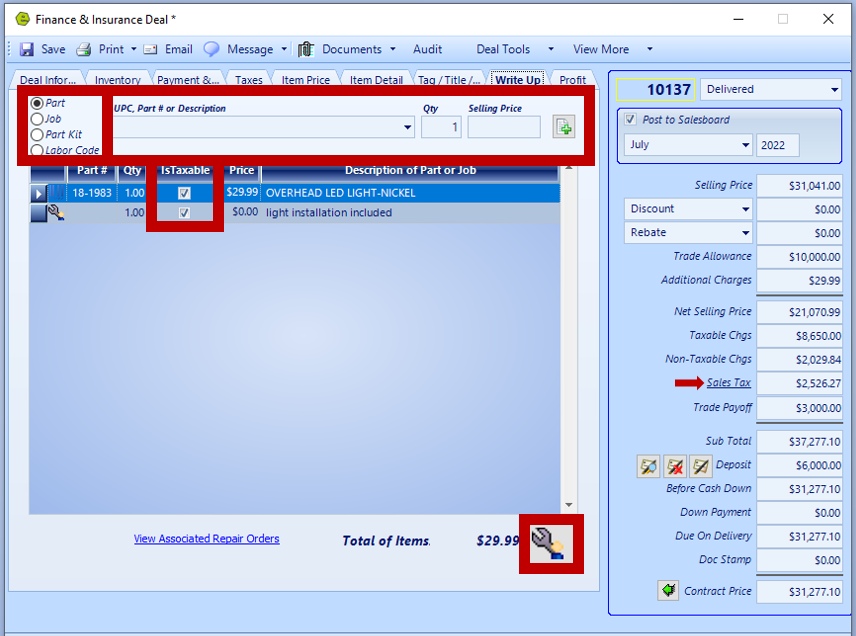
Write Up Tab
The Write Up Tab allows you to set-up an Internal Repair Order, to be added to the cost of the vehicle.
Click to add a Part, Job, Part Kit or Labor Code and type the UPC, Part # or Description in the corresponding field, then Enter. The part will be added or a search window will display choices, double-click to select the desired part(s). The part will not be taken out of inventory until the the Internal Repair Order is created. Also, the Part Pricing Category assigned to the Customer will not be deducted on Internal Repair Orders.
NOTE: The IsTaxable selection will auto-populate, based on how the part is marked in EverLogic. The IsTaxable selection can be changed, if necessary. The tax amount charged will reflect in the Sales Tax Field on the Deal Form.
Click the Wrench Icon, to create the Internal Repair Order. A Technician will need to be added to the RO and the RO will need to be closed before "Washing" the Deal.
WARNING: ONLY click the Wrench Icon once, otherwise, multiple Repair Orders will be created and require deletion to avoid double postings.
IMPORTANT: It is best practice NOT to open a new Internal Repair Orders on a newly sold unit, until the deal is washed & posted.
The Internal Repair Order Amount will be added to the Additional Charges Field on the Accounting Panel.

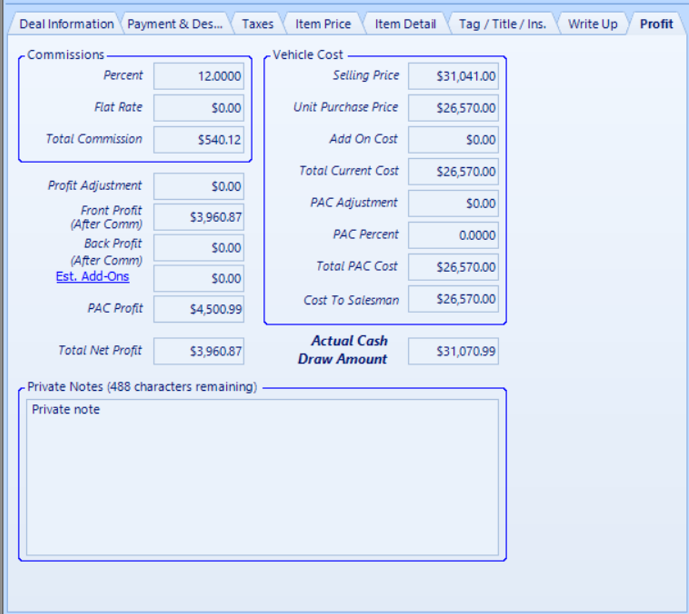
Profit Tab
This tab is used for estimation purposes only and does not affect the actual numbers that are entered in Profit Accounting during the "Wash" Process; see video for Profit Accounting. The Commissions Amount can be set-up as a default entry, as a percentage or flat rate amount, other details filter from fields completed on the other tabs. There is a Private Note available on this tab.
Tool Bar
The Tool Bar at the top of the Quote Desking Form include the options to Save, Print, Email, Message, Documents, Audit, Deal Tools and View More.

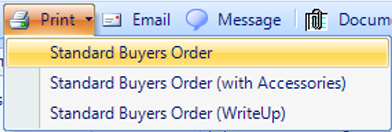
The Print Menu gives you the option to print different versions of the Standard Buyers Order.
Email is available if you are set-up to do so with EverLogic. Text Messaging is only available if you are enrolled with Kenect.
![]()
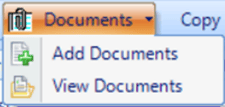
Documents: Click Documents, Add / View Documents, such as scanned drivers licenses or insurance card.
The Audit Button will provide on outline of all actions taken on the Deal Form.
![]()
Click the Deal Tools down-drop menu to see the options available, including Deal Defaults, 700Credit, Send to AppOne and Notify Kenect.

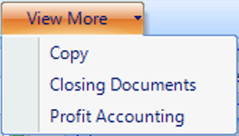
The View More Options include,
-
- Closing Documents: The information keyed on the deal will auto-populate to the appropriate closing document.
- Profit Accounting: Used to view the Front and Back Profit and to close or clear the deal, what we call “Washing the Deal”; see details in the next section.
Profit Accounting
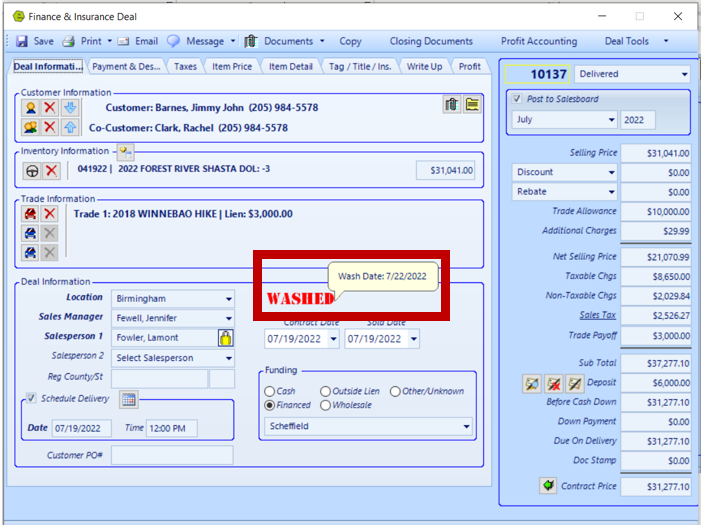
Before moving into Profit Accounting of the Deal, be sure to confirm the following attributes of the Deal Form;
There are a five things to check to ensure completion, so you can “Wash the Deal”.
- Status must be “Delivered”, you cannot, “Wash the Deal”, if it is not marked as “Delivered”. The Sub Status is an available, however, is not required.

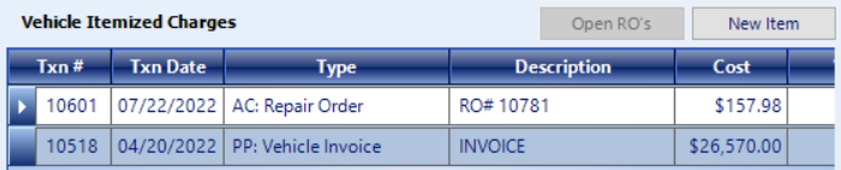
- Click the Steering Wheel Icon and confirm there are no Open ROs. The cost of the RO has not yet been added to the Deal, therefore the profit and cost margins will be wrong. For this example, I’ll go close it out and this will be considered Internal payment.
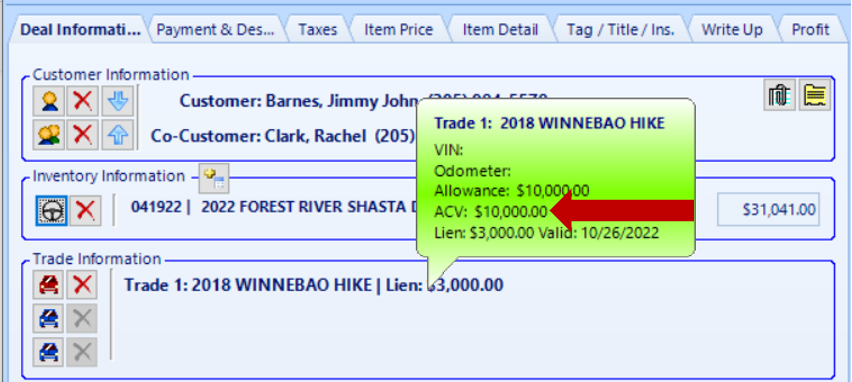
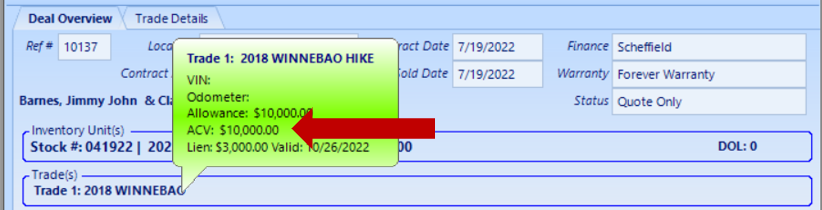
- Hover over the Trade Information and make sure the ACV is listed.
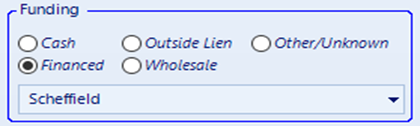
- Make sure the Finance Company is selected in the Funding Section.
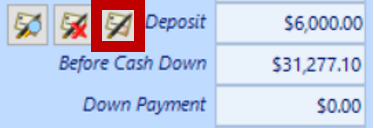
- Move / remove Down Payment to the Deposit Field. Click the Deposit Icon. Click for directions on Accepting / Refunding a Deposit on a Deal.
IMPORTANT: The Down Payment is ONLY used for negotiation. Once the Quote turns into a Deal, the Down Payment becomes the Deposit and will need to be placed in the correct Field.
IMPORTANT: Once these five things are complete, go to the View More Menu and select Profit Accounting.

Deal Overview details will auto-populate from the Deal.
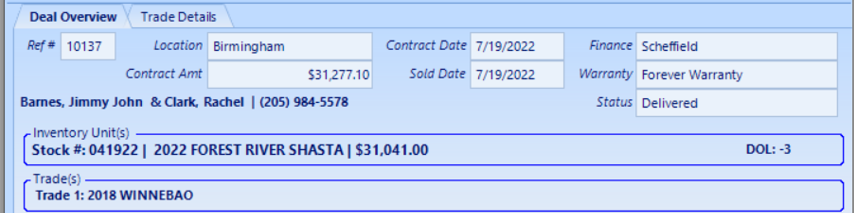
Inventory and Trades Hover to confirm the ACV is showing.
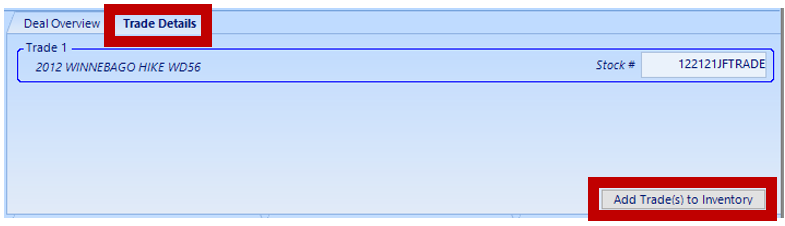
Trade Details Tab If the trade was not added to Inventory before entering Profit & Accounting, Key Stock #, to be assigned to the trade and click Add Trade(s) to Inventory Button.
Front Profit Tab
Front profit is the profit made from the sale of the vehicle itself. All details will auto-populate from the Deal Form.
-
- Vehicle Cost: Vehicle Adjustments indicate the add-on costs.
- Trade Information: Be sure to include before “Washing”.
- Inventory Breakdown: The breakdown of the costs, you can click Cost of Add-Ons to confirm.
- Suggested Retail Profit %, Net Selling Profit % and Cost % of Gross
- Front End Breakdown

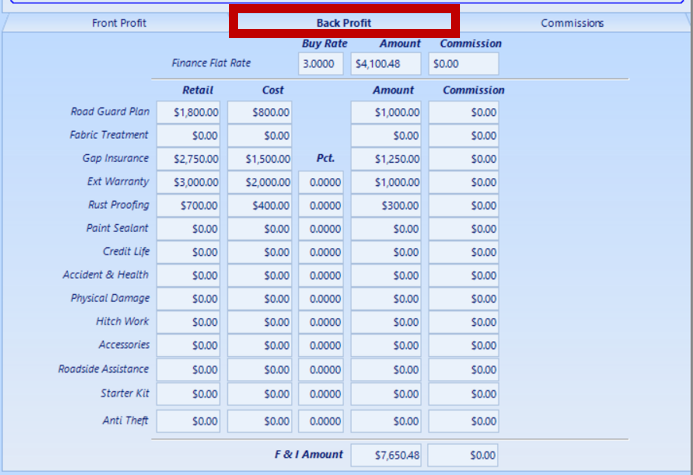
Back Profit Tab
Back profit comes from selling additional products and services after the vehicle sale, such as insurance, and warranties. The Retail Column will displays figures, auto-populated from the Deal Form.
-
- Buy Rate Amount, AKA Finance Reserve, AKA “Spiff” amount from the bank, received every time you get the Customer to use the bank for funding. This Field is used for the interest percentage the Dealer paid the bank for the loan. Key the rate or the flat rate amount you receive and hit the Tab Key and that amount will be calculated for you. Otherwise, you can key the amount of the Flat Rate, if you get a flat rate from the bank.
- Key your Cost for the items listed and hit the Tab Key for it to fill-in and calculate your profit under the Amount Column. The totals filter to F&I Amount, at the bottom, this is the amount the back-side made on this deal.
Commissions Tab
You may or may not use this tab, since EverLogic does not work with your payroll. Key in the Commissions for the Salesperson, Sales Manager and the Business or F&I Manager and Save. Commission Vouchers can be printed.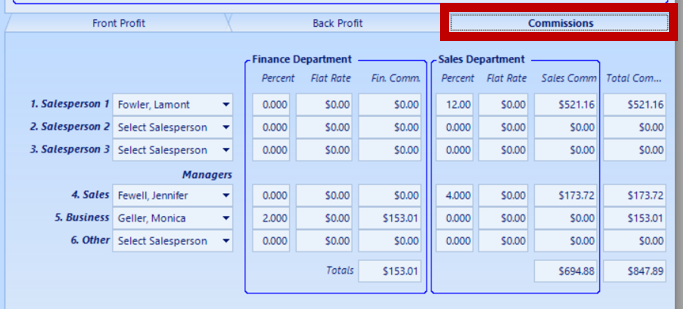
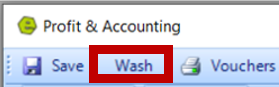
Click Wash and the Wash Sheet will display to print. The word "WASHED" will show on the Deal Form. Once the deal is "WASHED", it will show in List Unposted Deals, on the Office Operations Tab, to send to QuickBooks.
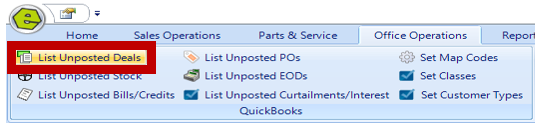
Navigate to Office Operations and select List Unposted Deals.
Double-click the Deal you wish to send to QuickBooks. Confirm all details are complete and accurate, then click Save.
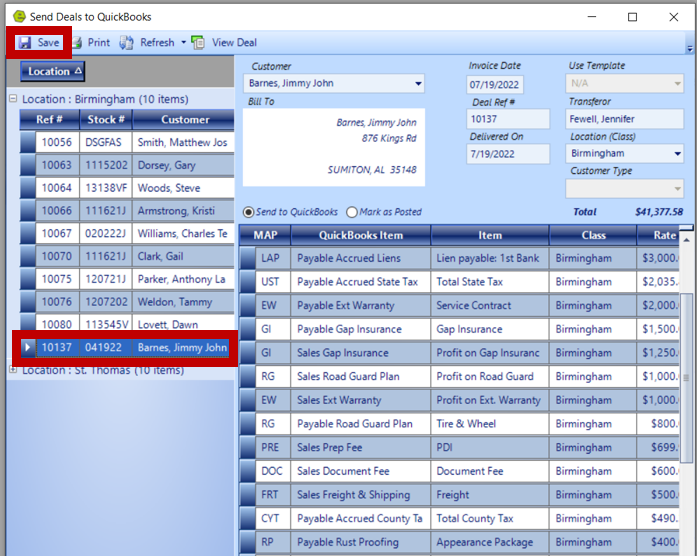
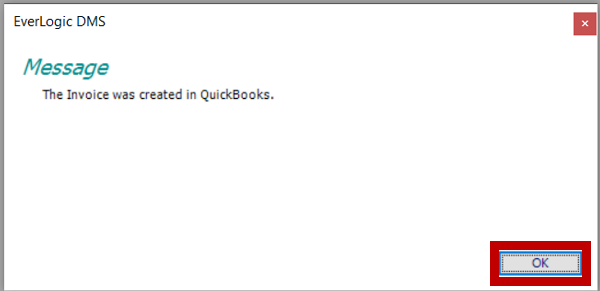
EverLogic will display the message "The Invoice was created in QuickBooks", click OK.
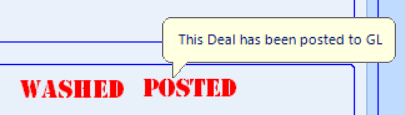
Return to the Deal Form to see the wording "POSTED", next to "WASHED".
IMPORTANT: If a Deal gets cancelled. be sure to Cancel Deal "Undo Sale & Restock" Inventory.
IMPORTANT: It is best practice NOT to open a new Internal Repair Orders on a newly sold unit, until the deal is washed & posted.
Related Articles:
Accepting / Refunding a Deposit on a Deal
Cancel Deal "Undo Sale & Restock" Inventory
More Than Three Trades to a Deal / Quote