
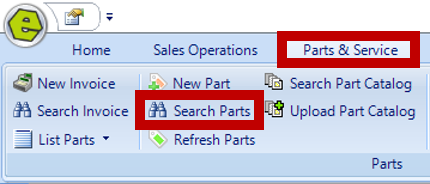
1. Navigate to the Parts & Service Tab and select Search Parts
2. Select from the available search parameters
-
- All, Taxable, Non-Taxable
- Part # - Enter the Part #, only a portion of the Part # has to be entered.
- UPC - Enter the UPC number, only a portion of the UPC has to be entered.
- Description – Enter a description, only a portion of the description has to be entered.
- Make – Enter a Make, only a portion of the Make has to be entered.
- Manufacturer # – Enter a Manufacturer #, only a portion of the Manufacturer # has to be entered.
- Location - The Location will default to that of the current user logged into EverLogic, and can be changed using the drop-down menu.
- Vendor – Enter a vendor using the drop down list.
- Bin 1 – Enter the Primary Bin Location using the drop down list.
- Bin 2 - Enter the Secondary Bin Location using the drop down list.
- Category - Enter the Category using the drop down list.
- You can also modify your search by Active Parts, Taxable Items, Non-Stock items, Minimum Levels and Obsolete, by checking the corresponding box(s)

3. Click Search

Toolbar Options
-
- Search will present values matching your criteria.
- New will start a new Part Form.
- Edit will open the highlighted part.
- Print allows you to print the formatted report.
- Export allows you to save the file in Excel format.
- Hide / Show will hide / show the search criteria, only show the result grid.
- Group By is a quick way to get totals and look at parts information differently. When selected, a gray area appears above the grid. You can click / hold / drag that column heading into the gray area to view the selected detail. Once done, re-group with click / hold / drag the column back into the grid and select another column.
- FlexView allows you to save your search view for quick access.
- Refresh will reset search criteria to defaults.
4. Right-click on the grid and select the columns to display
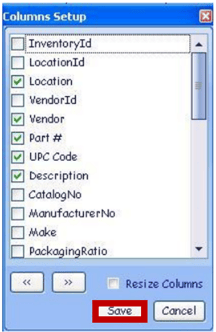
5. Click / hold / drag that column header to the position on the table
EXAMPLE: Notice Location is on the left side of the display, after making the change it displays the right side.


6. Close the display and the view will remain as selected
Related Articles:
System Setup for Alternate Part Numbers
Adding a New Part / New Part Inventory
Adding Parts to Inventory from a Invoice / Repair Order
Creating a Parts Purchase Order
Special Order Parts from an Invoice
Special Order Parts from a Repair Order
Receiving a Purchase Order and Creating a Back Order PO
Create / Close a Parts Invoice
Asterisk Showing on Parts Search