
Parts will be taken out of inventory once placed on the Repair Order. It is best practice to wait until the Deal is Washed before creating a new Repair Orders on recently purchased units /vehicles.
IMPORTANT: It is best practice NOT to open a new Repair Order on a newly sold unit until the deal is washed & posted.
REQUIRED: The word "policy" can ONLY be used as a Payment Type on a Warranty Repair Order.
Create a Repair Order
1. Navigate to the Parts & Service Tab and select New Repair Order
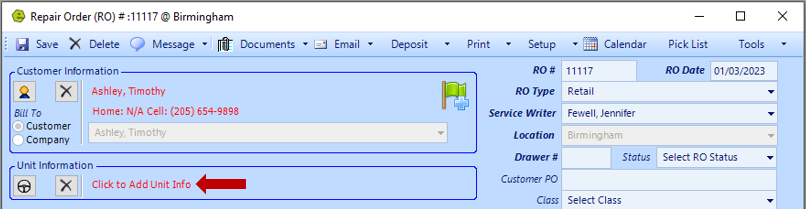
2. Click to Add Customer
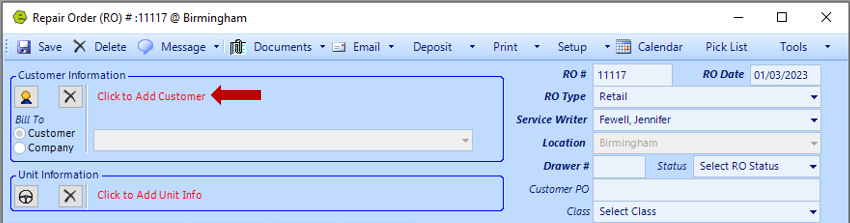
NOTE: The RO# and RO Date will auto-display.

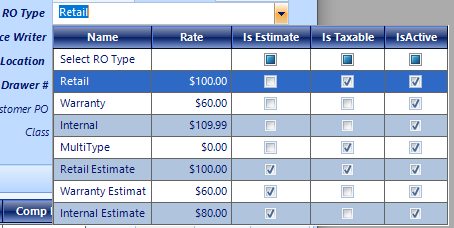
NOTE: The RO Type will default to Retail. The RO Types can be set-up in the System Set-up Feature. Multi-Type will allow for Retail, Warranty and Internal all on the same RO.
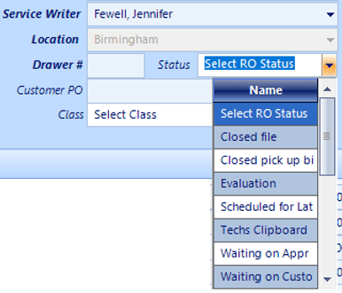
NOTE: You can select the Service Writer, the Location will auto-display. The Status is an overall Status of the entire RO. It is up to the Dealer, if you choose a Customer PO and Class.
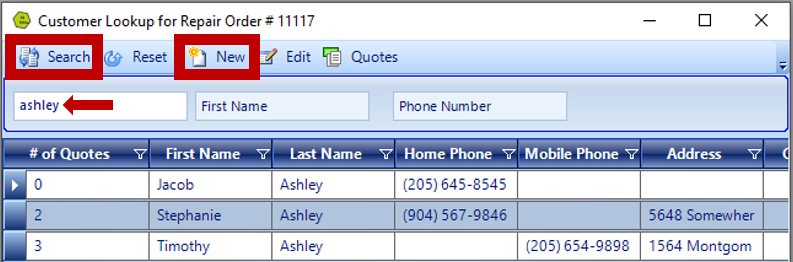
3. Search for an existing Customer or click New to add a new Customer
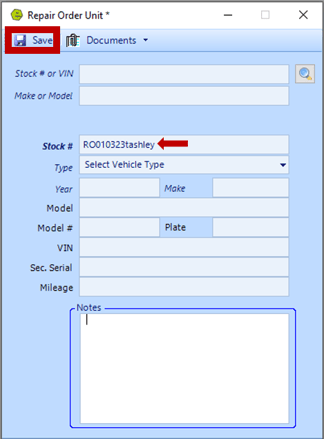
4. Click to Add Unit Info
NOTE: If the Customer bought their unit from your Dealership, it will display to be selected.

NOTE: If the Customer did not buy their unit from your Dealership, you can create a Repair Order Unit, by completing the form below. Stock # is the only required field on this form.
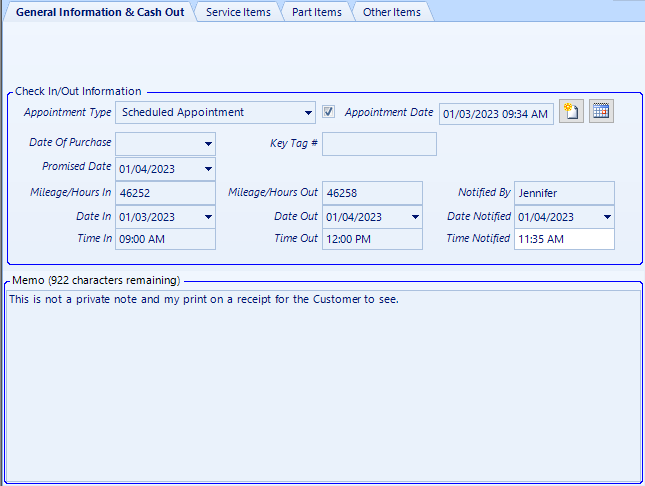
5. Set-up an appointment by completing the fields on the General Information Tab
NOTE: Other details can be added;
-
-
- Date In / Out
- Time In / Out
- Mileage In / Out
- Notified
- Key Tag #
-
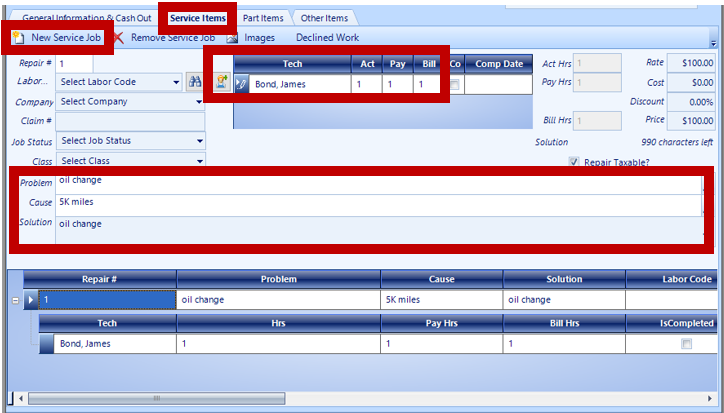
6. Access the Service Items Tab and click New Service Job
7. Key the Problem, Cause and Solution
8. Select a Technician and indicate the Actual, Payable and Billable hours
-
- Actual: Specific time it took the Tech to complete the job.
- Payable: The amount the Tech gets paid for completing the job.
- Billable: The amount the Customer is billed for the repair.
NOTE: There is no limit to the number of Service Jobs that can be added to a Repair Order. The Service Jobs will display at the bottom of the Service Items Tab.
Additional Options:
-
-
- Remove Service Job
- Add Images
- Declined Work
-

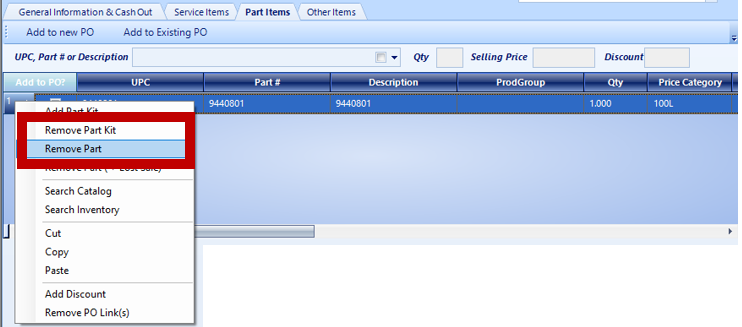
9. Access the Part Items Tab to add parts for each Service Job
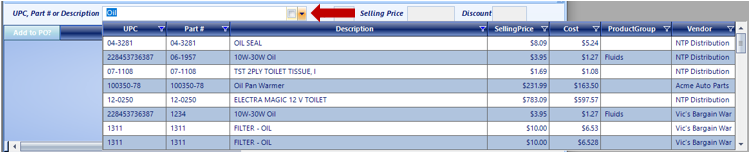
10. Key UPC, Part # or Description and click the down-drop arrow, to select from inventory
NOTE: If the part is not in inventory, follow this link to Parts Catalog Search / Order.
IMPORTANT: Right-click to Remove Part (Kit).
11. Access the Other Items Tab to find charges for Shop Supplies and Environmental Fees
NOTE: You can override these fee amounts, by clicking the Override Button and changing the Amount.
Sub Contracted Work: Use this link on How to Add a Sublet to a Repair Order. Remember to select a Vendor for the Sub Contracted Work. You can also remove a sublet, by using the right-click function.

12. Save
Close a Repair Order
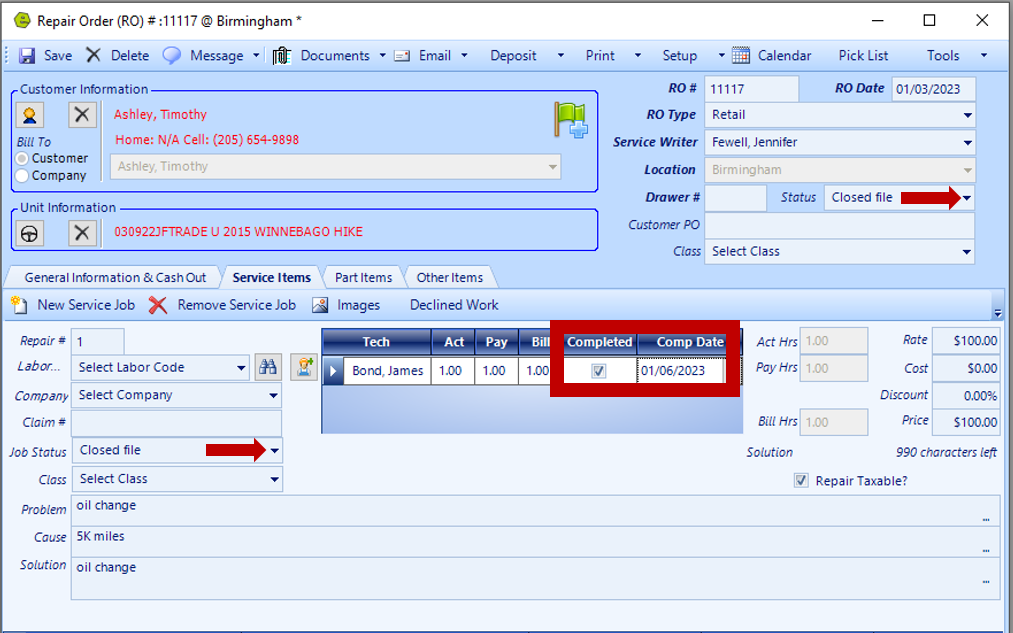
IMPORTANT: Be sure to check these items before closing a Repair Order.
-
-
-
- Each Service Item should be marked as complete and Job Status "Closed File".
- RO Status marked as "Closed File".
-
-
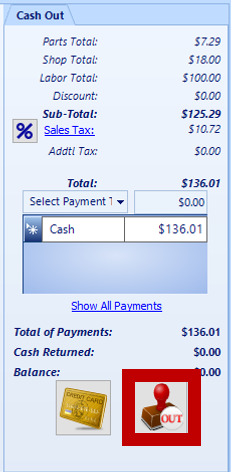
1. Access the General Information & Cash Out Tab
2. Select the Payment Type and hit Enter or Tab to get the payment amount into the Payment Box
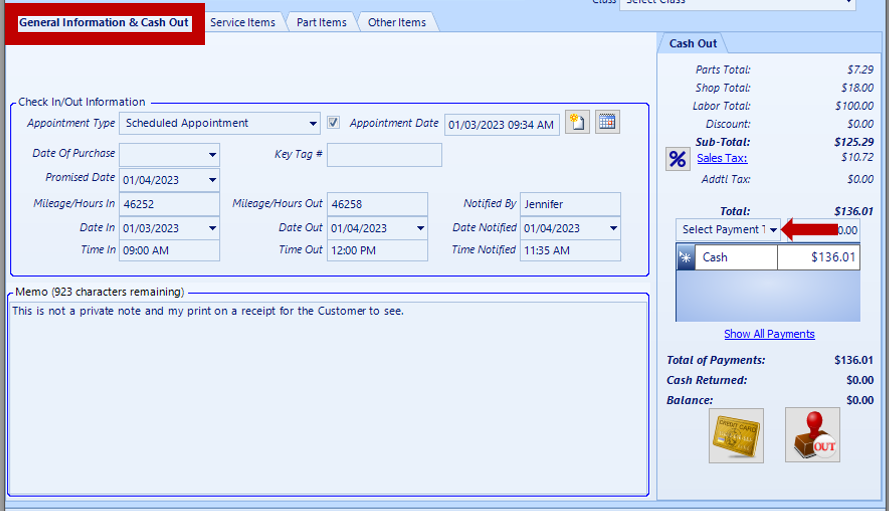
IMPORTANT: Multiple payment types and / or deposits can be accepted. Remember, Payments will show on the EOD, the day you close-out the Repair Order. Deposits will show on the EOD, the same day you take the Deposit; Accepting / Refunding a Deposit on Invoices / Repair Orders.
3. Click the Cash-Out Button
NOTE: Receipts will display to print.
IMPORTANT: By default, deposits on a Multi-type RO will go on the retail portion and warranty company deposits will go on the warranty portion. Reason being when the deposits and Repair Order goes to QuickBooks they need to be under the same name to be auto-applied.
REQUIRED: The word "policy" can ONLY be used as a Payment Type on a Warranty Repair Order.
Related Articles:
Accepting / Refunding a Deposit on Invoices / Repair Orders
Adding / Viewing Images on Repair Orders
Adding the Same Part to Individual Jobs on a Repair Order
Using a Non-part Part Number on an Invoice / Repair Order
Setup Shop Supply / Environmental Fees