Vehicle Inventory is used to identify the unit you are selling.
1. Navigate to the Sale Operations Tab and select New Inventory

2. Complete the Vehicle Inventory Form
REQUIRED FIELDS: Stock #, New / Used / Demo, Year, Make, Model and at least one Itemized Charge. Entering more information makes it easier to search for the right unit, to meet your Customer's needs.
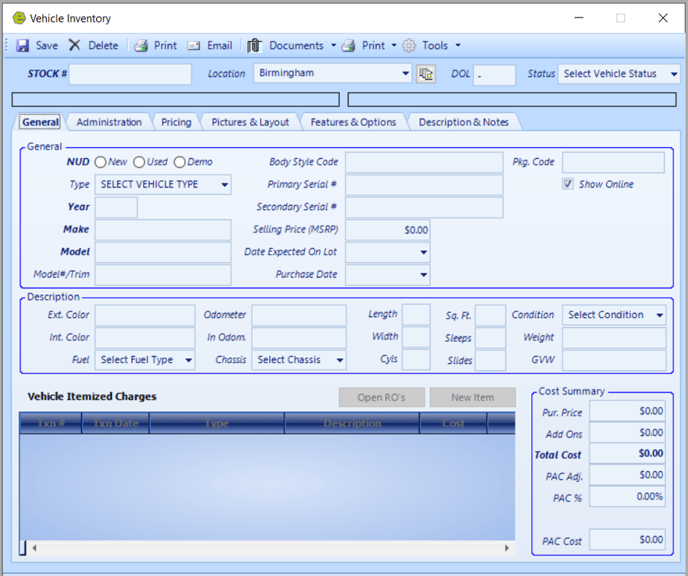
Stock # - The Stock Number is mandatory and must be unique; vehicle stock number has a limit of 26.
Location - The Location can be assigned using the drop-down list. Click the icon to the right of the location to displays a vehicle history. The history will show when the inventory was moved from one location to another, and includes From Location, To Location, Effective Date, and the Users name who moved the inventory.
DOL (Days on Lot) - The DOL is auto-calculated based on the Purchase Date, once entered, the DOL Field will populate.

Vehicle Status: Vehicle Status is defined in the System Setup Tab. A Vehicle Status can be manually selected, however, EverLogic automatically updates the Vehicle Status based on certain actions performed.
- If entering in new inventory using the New Inventory PO option, the Vehicle Status is automatically set to "On Order".
- Once a Deal is "Washed", the Vehicle Status is updated to "Sold".
IMPORTANT: If a Deal gets cancelled. be sure to Cancel Deal "Undo Sale & Restock" Inventory.
NOTE: You can add additional Vehicle Statuses on the System Setup Tab.
The boxes below will display based on these three transactions;
- If the Vehicle is marked as "Sold", the Customer's Name and Sold Date will display in the box on the top-right and the Deal number will display in the box on the bottom-right.

- If the Vehicle is a Trade Unit, the Customer’s Name and the date the trade was placed into inventory.

General Tab
- General Information
- NUD - Defined as New / Used / Demo is a required field.
- Vehicle Type – Is user defined in the System Setup Tab.
- Year - Year the Vehicle was manufactured, is a required field.
- Make - Make of the Vehicle is a required field.
- Model - Model of the Vehicle is a required field; limit of 41 characters.
- Model # / Trim - Code can be keyed to describe the specific Vehicle.
- Body Style Code - Code can be keyed to describe the specific Vehicle.
- Primary Serial # / Secondary Serial # - Two fields are available to enter the Vehicle VIN Numbers. Click the yellow box to verify the VIN.
- Selling Price (MSRP) - In a quote populates the field Selling Price. MSRP can be overridden in the quote on the profit tab.
- Date Expected on Lot - Specify the date the Vehicle is expected to be available on the lot. This date will translate as the Delivered Date on the Vehicle Inventory List.
- Purchase Date - Select the date the Vehicle was purchased. The DOL is calculated based on the Purchase Date.
- Package Code - Some units may be sold as a package, ie a boat, trailer and motor. It is recommended that the Package Code be at least three characters. When adding packaged inventory to a deal, the Package Code is used instead of the individual Stock Numbers.
- Show Online - Check this box to show this unit on the Dealership Website. We send "In Stock" vehicles to Trailer Central daily, at approximately midnight.

- Description (The Description Information is optional, however, if entered, can be displayed on the window sticker and various reports.)
- Exterior Color
- Interior Color
- Fuel Type
- Odometer
- In Odometer
- Chassis
- Length (can be displayed using a decimal point)
- Width (can be displayed using a decimal point)
- Cylinders
- Square Footage
- Sleeps
- Slides
- Condition can be selected using the drop-down menu.
- Weight
- GVW (Gross Value Weight)

- Vehicle Itemized Charges ( If the user has the Authority to change Inventory Itemized Costs permission they can change it to whatever they want, whenever they want.)
WARNING: DO NOT open new ROs on the sold unit until deal is washed & posted.
-
- If there are any open Repair Orders on the vehicle / unit, the number of open RO’s will display. Click the Open RO Button to view the Open Repair Orders attached to the unit.

1. Click the New Item Button
2. Select the Type, using the drop-down list
-
-
- PP (Purchase Price): Make a selection in the Type Field, a Description is required. Key the Dealership Cost in the Cost Field. The Vehicle Purchase Price will auto-populate in the Pur. Price Field on the right side, under the Cost Summary, used in accounting. Be sure to select the correct Vendor for accounting purposes.
- AC (Add-on Cost): Other Add-ons can be defined using the drop-down. Selecting the correct category is important for accounting purposes.
-
NOTE: Internal Repair Orders can be added as an Add-on Cost to the inventory.
VERY IMPORTANT: If the Purchase Cost of the unit needs to be changed, and the unit has already been posted to QuickBooks, add a new Itemized Charge Line for the positive / negative amount. This change will go over with the deal.
REMINDER: The Vendor is required for accounting in QuickBooks. The Itemized Charge does not go over with the unit, it goes over on the Deal or you can send it over as a bill. If the unit has been posted to QuickBooks and later a Repair Order is added to the unit as an Itemized Charge on the Unit Inventory, the Itemized charge does not get posted to QuickBooks with the unit, it will go over on the Deal or you can send it over as a bill.

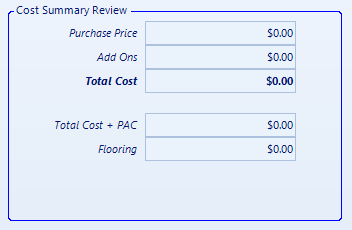
- Cost Summary
- Purchase Price - Auto-populates from the PP items keyed in the Vehicle Itemized Charges.
- Add-ons - Auto-populates from the AC items keyed in the Vehicle Itemized Charges.
- Total Cost
- PAC Adj - PAC can be a flat amount
- PAC% - PAC can be a percentage %
-
- PAC Cost Total of Cost Summary
Administration Tab
There are no required fields on the Administration Tab.
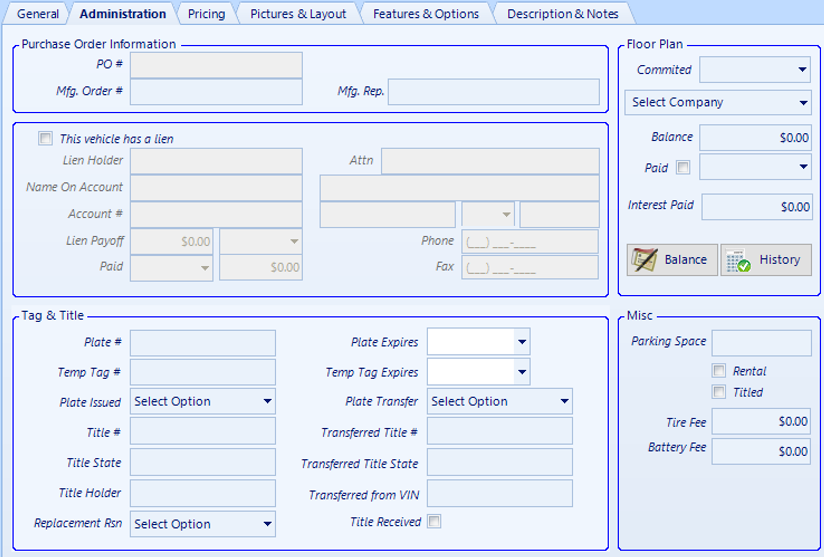
- Purchase Order Information
- EverLogic will automatically assign a PO#, if the unit was created using the New Inventory PO.
- The Manufacturers Order # and Representative can be keyed.

- Floor Plan
NOTE: If using Vehicle Inventory Form to enter Curtailment and Interest payments, they will show in the List Unposted Bills and Credits to be sent to QuickBooks. It is recommended to enter Curtailment and Interest payments from the Office Operations Tab on the List Unposted Curtailments / Interest.
REMINDER: Using the Paid Button on the Administration Tab will cause the unit to no longer show on floorplan report.
- Vehicle has a lien
- Check the box and key the lien information available.

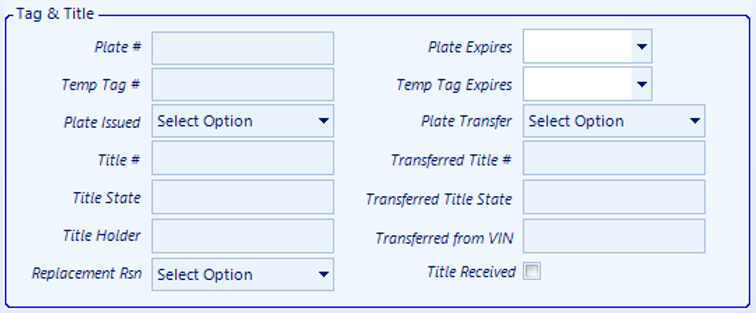
- Tag & Title (record the Plate #, Temp Tag #, etc)
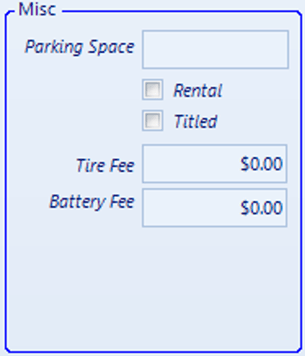
- Misc Section
- Parking Space
- Rental or Titled
- Specific Tire Fees
- Specific Battery Fees
Pricing Tab
The title properties of the pricing categories can be changed; right-click and make necessary changes.

P1 - The MSRP is driven by the Selling Price, you cannot manually adjust this field.
P4 - If the Dealership is set-up for EverLogic to send details to your website, this field will feed the Web Price to your website. This feed will happen with the info keyed in this fourth field, no matter what this line is titled.
NOTE: The purpose of the "Use Formula" Checkbox is to allow dealers to set one-off pricings for a particular unit. For example, let's say the formula for P-5 Clearance Price is MSRP * .95, but the dealer wants to assign a a different discount to a specific unit.
Formulas can be created when adding an unit, to auto-calculate the line amount, starting on the fourth field. It will save on the form for future units, remember to always confirm if you want to use the formula when adding new units. Click the "Use Formula" Checkbox and key the formula, examples below;
-
-
-
- [//Pricing - MSRP] * .78.
- [//Pricing - MSRP] * 90%
- [//Pricing - MSRP] *75%
- if( ([//Pricing - P2] + [//Pricing - P3]) >=12000
- if ( [//Days On Lot] <= 90
- (([//Pricing - P2] + [//Pricing - P3]) * 1.225)
- if ( [//Days On Lot] <= 180
- (([//Pricing - P2] + [//Pricing - P3]) * 1.175)
- if ( [//Days On Lot] <= 270
- (([//Pricing - P2] + [//Pricing - P3]) * 1.125), (([//Pricing - P2] + [//Pricing - P3]) * 1.075))))
- if( [//Days On Lot] <= 90
- ( [//Pricing - P2] + [//Pricing - P3] ) * 1.25
- if ( [//Days On Lot] <= 180
- ( [//Pricing - P2] + [//Pricing - P3] ) * 1.20
- if ( [//Days On Lot] <=270, ( [//Pricing - P2] + [//Pricing - P3] ) * 1.15
- ( [//Pricing - P2] + [//Pricing - P3] ) * 1.10 ) ) )
-
-
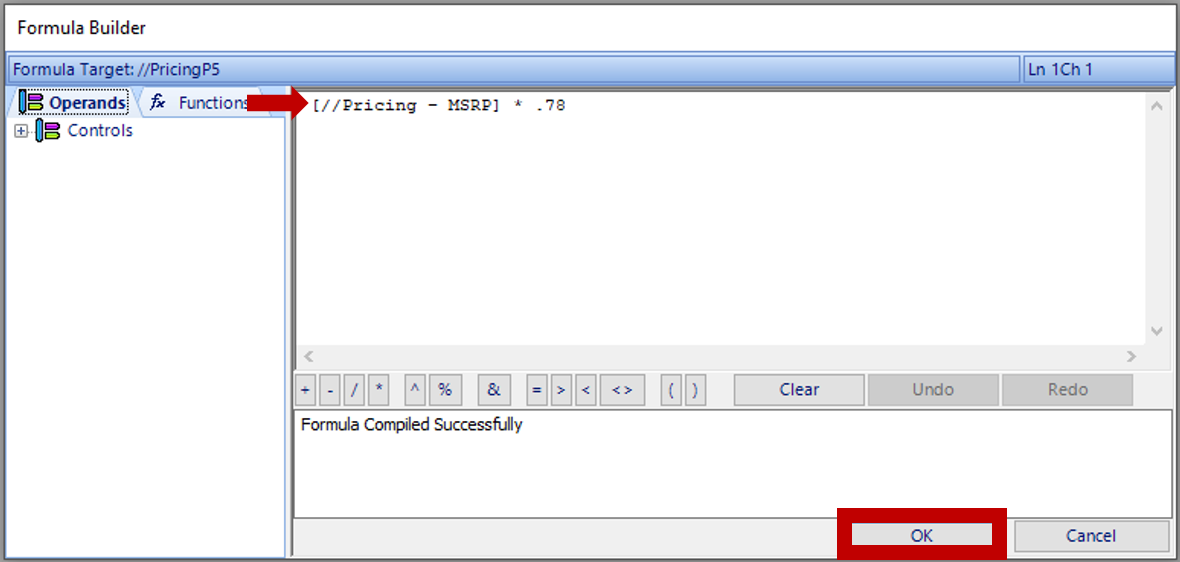
P5 - The Dealer can mark a unit down and not lose the original MSRP / Selling Price. Enter the Clearance Price and check the box. The Quote / Deal Form will only show the amount displayed in the P5 Field, if the box is checked.
![]()
- Valuation If you do not use the Pricing Matrix you can manually key List, Retail and Wholesale prices.

- Cost Summary Review Amounts will auto-populate.
Pictures and Layout Tab
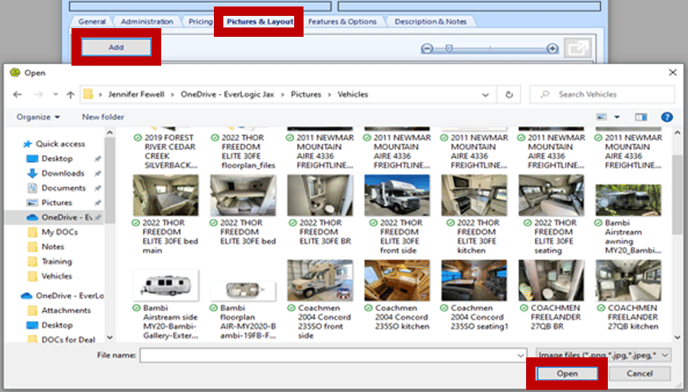
NOTE: The photos will display on your website in the order shown on the Picture and Layout Tab.
Upload photos from file;
- Click the Add Button
- Locate the picture
- Click Open
Description & Notes Tab
-
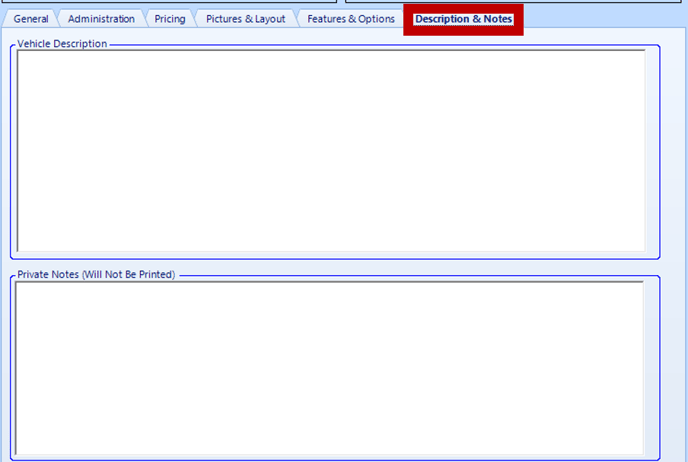
- Vehicle Description - This field allows copy / paste function.
- Private Notes - A private note will not display anywhere else in the system.
Toolbar Options

- Save - To save changes to the Vehicle Inventory Form.
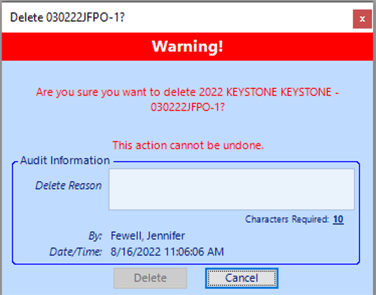
- Delete - Allows the unit to be deleted from EverLogic. A Warning Message is presented, "This action cannot be undone". A Delete Reason of at least ten characters is required for the Delete Button to become active.
- Print - Prints the Vehicle Description and Cost.
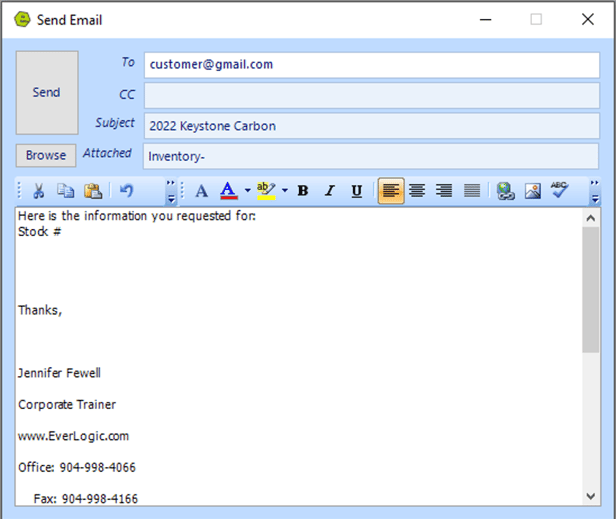
- Email - Email is available, if the Dealership set it up and the employee profile is updated with their work email and work email password.
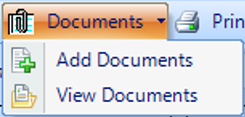
- Documents - Allows you to Add / View Documents formatted as a PDF, JPG, or GIF.
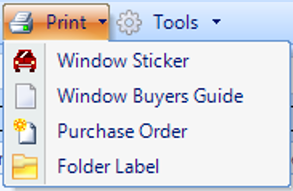
- Print - Items available to print include;
- Window Sticker - There are some control options to see Options and Descriptions, just Options or just Descriptions. The System Rule for ViewRule, is used to determine how the window sticker will look.

- Window Buyers Guide - Options to choose include Warranty or "As Is". Click Remember, to save the items selected for printing Window Buyers Guide on other units.
- Purchase Order
- Folder Label
- Window Sticker - There are some control options to see Options and Descriptions, just Options or just Descriptions. The System Rule for ViewRule, is used to determine how the window sticker will look.
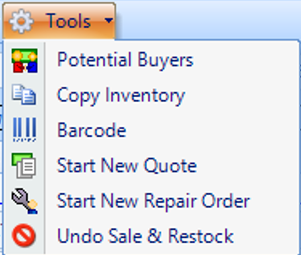
- Tools
-
- Potential Buyers - will list any customer to whom this piece of inventory has been quoted. Displayed are the Customers First Name, Middle Name, Last Name, E-mail, Home Phone, Work Phone, Cell Phone, Fax, Address line 1, Address line 2, City, State, and Postal Code.
- Copy Inventory - A quick way to enter new inventory. Select the inventory that is most similar to the new item. When copy is selected, new inventory is created. Reminds you to enter a new stock number. Update the VIN and add an itemized charge(s).
- Barcode - prints barcode
- Start New Quote - Start a new Deal Quote, with the unit automatically added to it.
- Start New Repair Order - A new Repair Order can be created, the unit will automatically be added to the Repair Order and amounts will show as a Itemized Charge added as an Add-on Cost of the Unit.
- Undo Sale & Restock - If the deal falls through, return the Vehicle to Inventory with the Status of "In Stock".
Related Articles:
New Vehicle Purchase Order Form (Multi-Unit Ordering)
Adding PAC as a Default to Vehicles
Mapping Vehicle Type in QuickBooks
Enter Floor Plan Balance on a Unit
How to Change the Floor Plan Starting Balance of Unit Inventory
Correcting Curtailment Payment Keyed as a Negative Amount
Cancel Deal "Undo Sale & Restock" Inventory
