Special Order Parts from a Repair Order
Every part must be entered into EverLogic, even if it is just a one-time "Special Order". Fortunately, in EverLogic you do not need to leave the Repair Order to complete this simple task.
1. Access the Parts Items Tab on the Repair Order
2. Key the UPC, Part # or Description
3. Hit the Enter Key
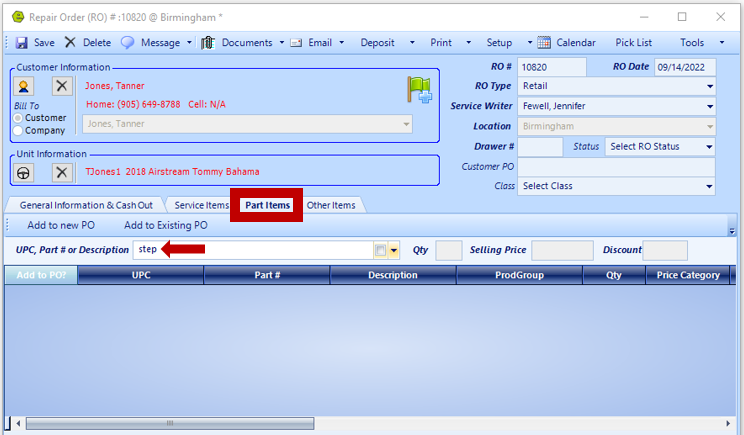
4. Click the "My part is not here" Button 
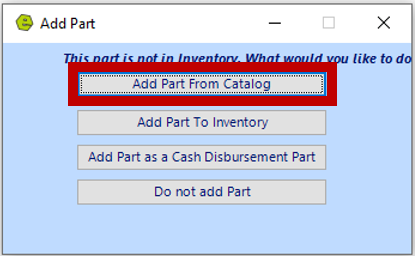
5. Select "Add Part From Catalog"
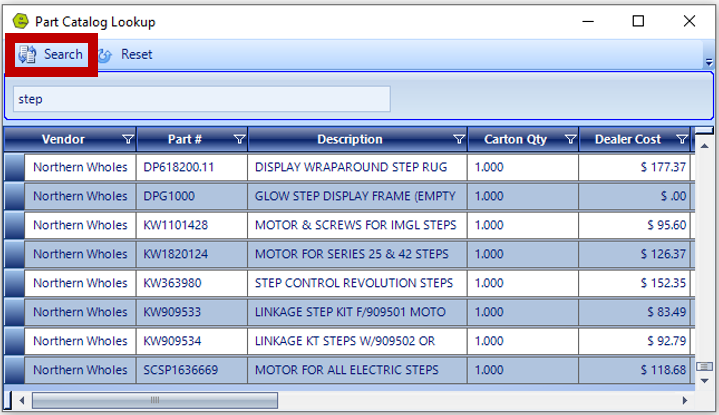
6. Click Search
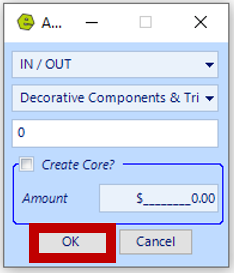
7. Designate Bin
8. Select Category
9. Enter the number already in stock
10. Assign as a Core and add Core Amount, if necessary
11. Click OK
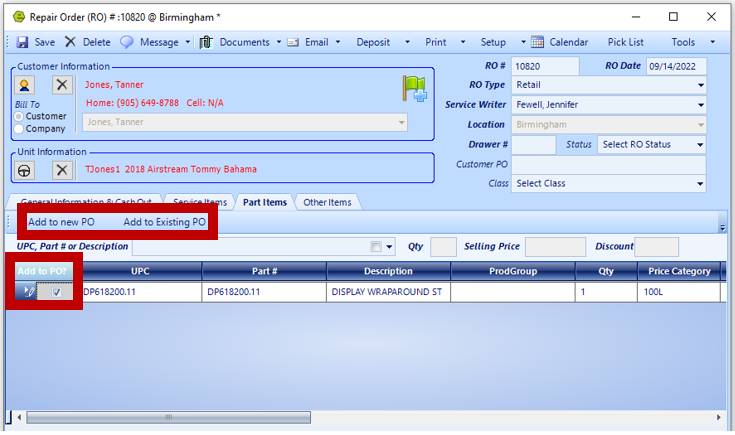
12. Click the "Add to PO?" Button
13. Choose to Add to a new PO or Add to Existing PO
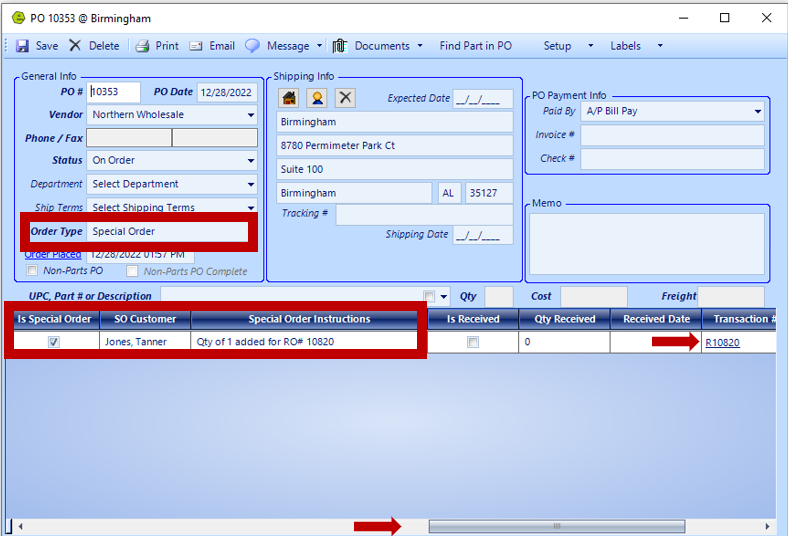
14. Complete any required fields; notice the Order Type shows as Special Order
15. Scroll to the right to view the Customer Name associated with the Special Order, along with the RO#
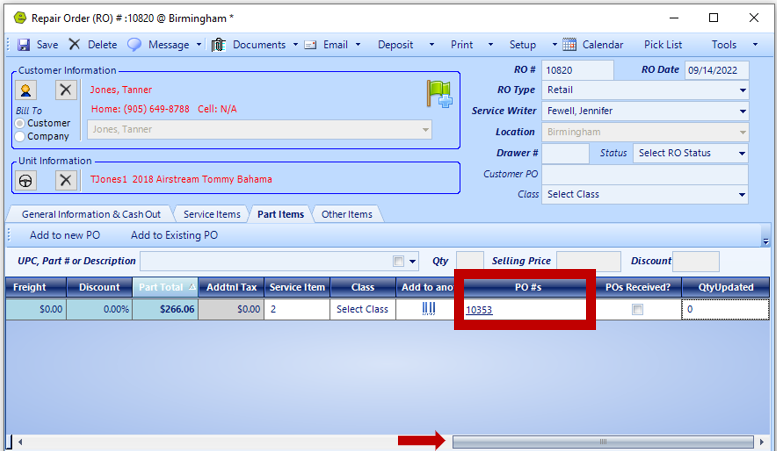
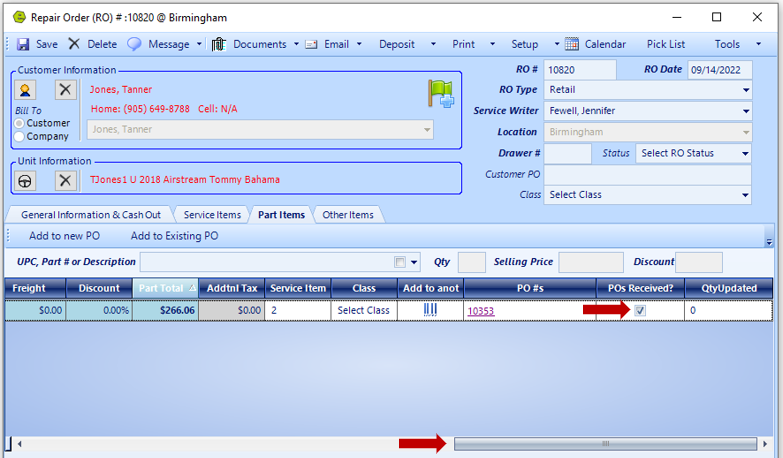
16. Return to the RO and scroll to the right to view the PO# associated with the Special Order
17. Navigate to the Parts & Service Tab and select Receive POs

18. Select the Vendor or key the PO #
19. Click Search
20. Select the PO to be received

21. Key the Quantity Received
22. Click the Receive Item(s) Button

23. Click OK
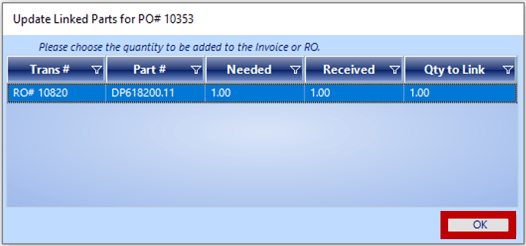
24. Return to the RO and scroll to the right to view the POs Received Button checked
Related Articles:
System Setup for Alternate Part Numbers
Adding a New Part / New Part Inventory
Adding Parts to Inventory from a Invoice / Repair Order
Creating a Parts Purchase Order
Special Order Parts from an Invoice
Receiving a Purchase Order and Creating a Back Order PO
Create / Close a Parts Invoice
Asterisk Showing on Parts Search