
EverLogic’s Technician Scheduler is a powerful tool in managing the Service Department Workforce.
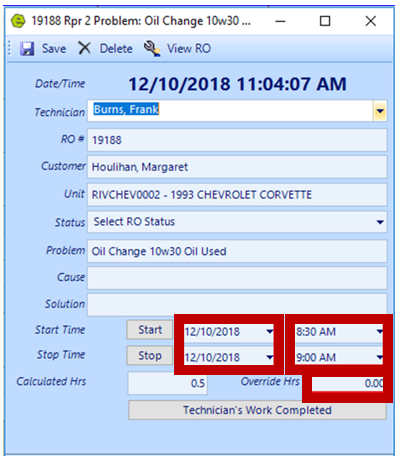
Your access capabilities will determine what you can see and do in the Technician Scheduler. As a Technician, you will be able to start, stop and complete work on repairs. The Manager has the ability to edit the time of the work, and can manually update the date and time and override hours for a repair.
Manager Assigns Jobs to Technician
1. Navigate to the Parts & Service Tab and select Technician Scheduler

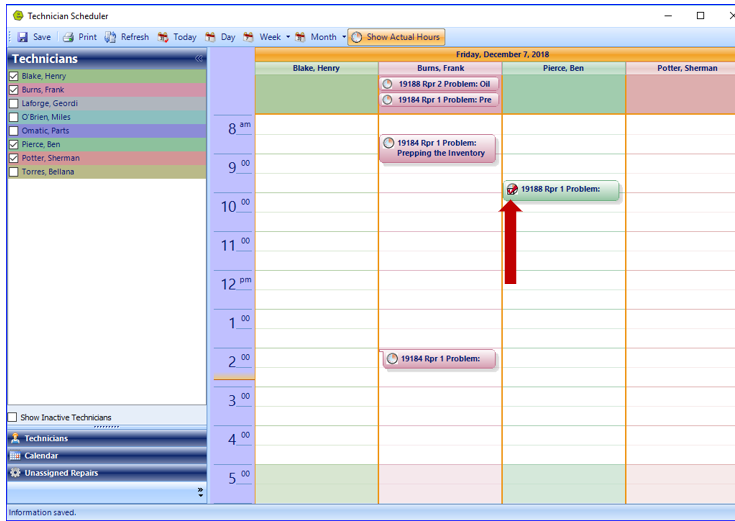
NOTE: The color tiles shown at the top of the calendar grid are known as the Technician's Clipboard.
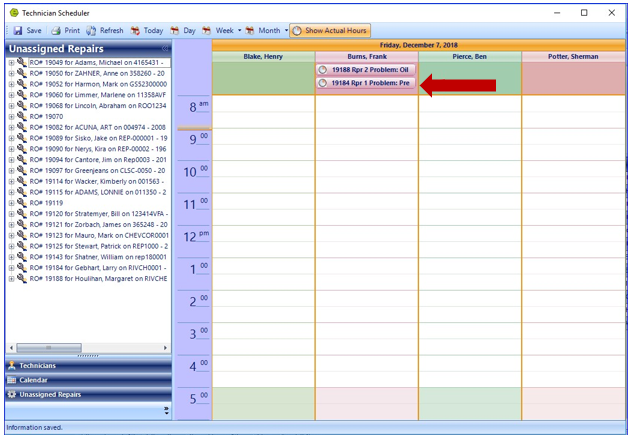
2. Place a checkmark next to the name of the Technicians working for the day
EXAMPLE: This example shows four Technicians working, they are displayed on the left, with a checkmark next to their name. The checkmark will open the Technician's Clipboard, to allow job assignment.
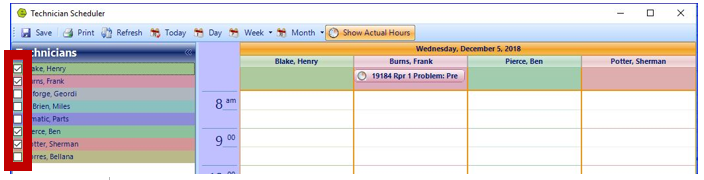
Notice, Tech Frank Burns already has a Repair Order assigned on his Clipboard. This occurred when the Service Writer created the Repair Order, and assigned Frank Burns as the Technician to do the job.
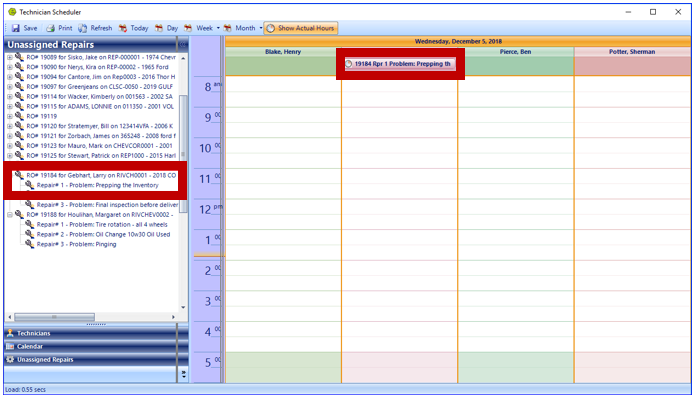
3. Open Unassigned Repairs, bottom left, to open a view of the Repair Orders available for assignment
4. Click on the plus sign to expand the Repair Order to show all the job line items
5. Use click / hold / drag function, to place the repair job line onto the Technician’s Clipboard
NOTE: The repair will then appear on the Tech's Clipboard, in the Tech Scheduler.
Technician Working a Job
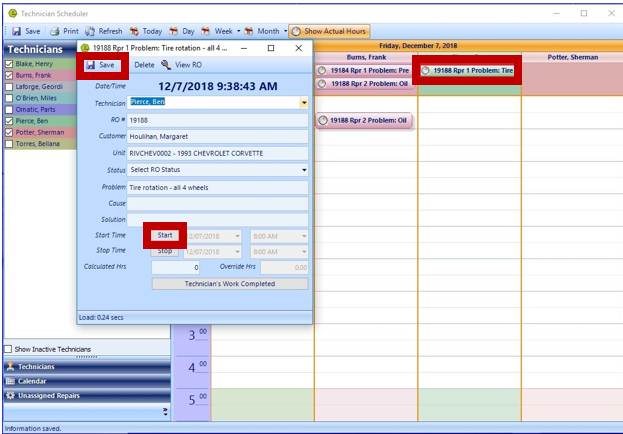
1. Double-click the job on the Tech Clipboard and click the Start Button, then Save, to initiate the time-keeping process on the job
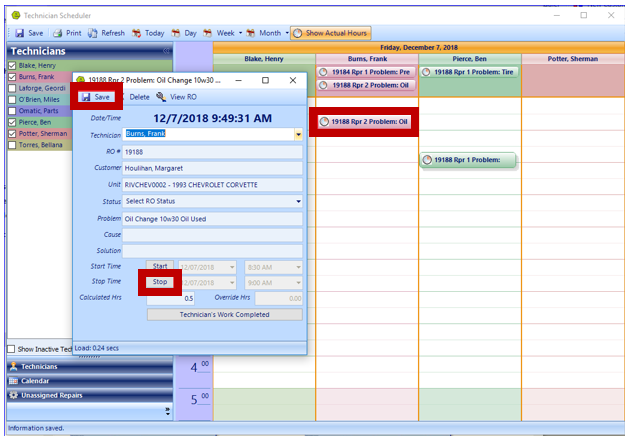
3. Double-click the job on the Calendar Grid and click the Stop Button, then Save, to stop the time-keeping process on a job, (ie lunch, meeting, end of shift, etc.)
NOTE: The Technician will be able to continue the job on the following day, if it is not completed the same day it is started.
4. Resume work, by double-clicking the job on the Clipboard, not the calendar time grid
IMPORTANT: At this point, clicking the job from the calendar grid, will remove the previous work session and start a new one.
5. Click Start and Save
NOTE: This can be done as many times as necessary to accommodate lunches, breaks, or any unplanned interruptions.

Technician Finishing a Job
1. Double-click the job on the calendar time grid and click Stop
2. Click Technician’s Work Completed and Save
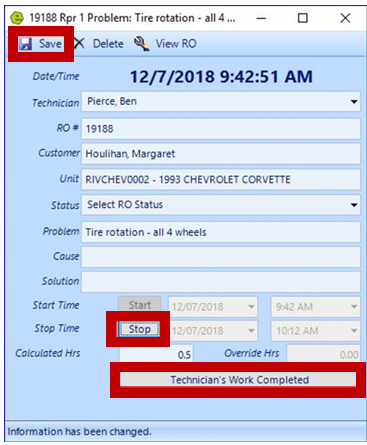
NOTE: Completed work will show with a red checkmark over the clock icon.
Remember: Always Start work on a repair job from the Clipboard and Stop / Complete it in the calendar time grid. All jobs that are not completed on the current day will automatically roll-over to the following day.
NOTE: The main difference, between the Technician’s view and the Manager’s view, is the Manager has the ability to edit the time of the work. Managers can manually update the date and time and override hours for a repair.
Related Articles:
Accepting / Refunding a Deposit on Invoices / Repair Orders
Adding / Viewing Images on Repair Orders
Adding the Same Part to Individual Jobs on a Repair Order
Using a Non-part Part Number on an Invoice / Repair Order
Setup Shop Supply / Environmental Fees