Key Benefits and Features of the EverLogic Mobile App for Technicians:
- Technicians can easily manage all their tasks in EverLogic while away from the computer
- Technicians can quickly track job times, search for parts, view all current jobs, and more
- Technicians can take pictures of damages to units and work performed to correct problems
- Technicians can see their job stats for the current and previous weeks
- Technicians can seamlessly transition between EverLogic Mobile and EverLogic Desktop
Mobile App License
Licenses for the Mobile App are separate from Desktop licenses. The Mobile App License is $39 per month. A desktop license is not needed to access the Mobile App, but an employee login needs to be set up for the Tech. Any tech with an EverLogic login profile can sign onto the EverLogic Mobile App.
- Recommended browsers: Chrome and Firefox
- Supported Browsers: Chrome, Firefox, Safari, and Edge.
- Not recommended: Internet Explorer
Sign On
Access http://apps.everlogic.com and enter Dealer Name, EverLogic User Name and Password, these are the same credentials used to access the EverLogic Desktop. 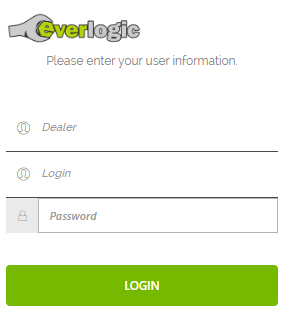
Dashboard
The Dashboard is the landing page, once signed onto the app. There are four sections summarizing information for the Technician.
- Work Stats
- Last Completed
- Actions
- Open Jobs
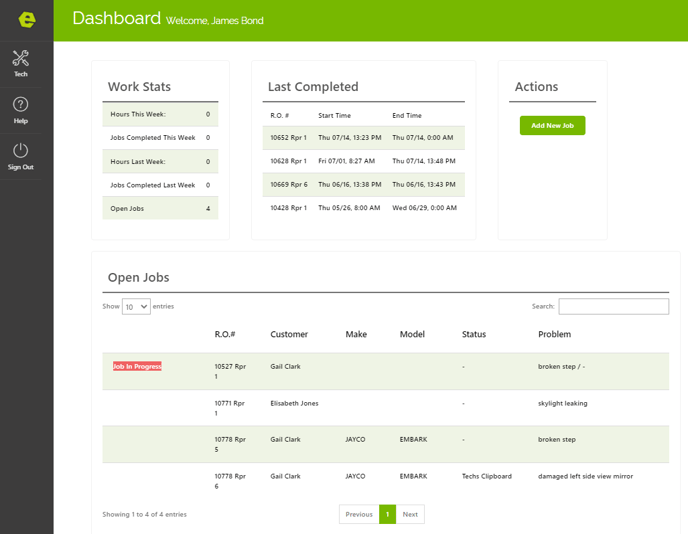
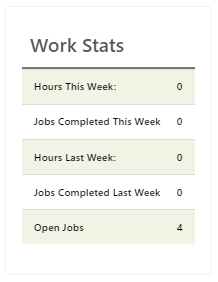
Work Stats
Work Stats shows summary of
- Hours This Week
- Jobs Completed This Week
- Hours Last Week
- Jobs Completed Last Week
- Open Jobs
Last Completed
Last Completed shows recently completed jobs.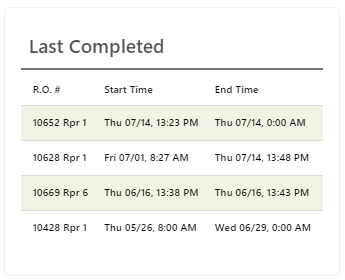
Open Jobs
Open Jobs shows jobs that have been assigned to the Technician, which remain open. Once the Technician clicks the Start Button, the wording "Job in Progress" will show in red. The number of jobs in the list is configurable, the search box will search all columns for the criteria and will filter the list to display only jobs that match the criteria. Click on a job row to open the Job Details.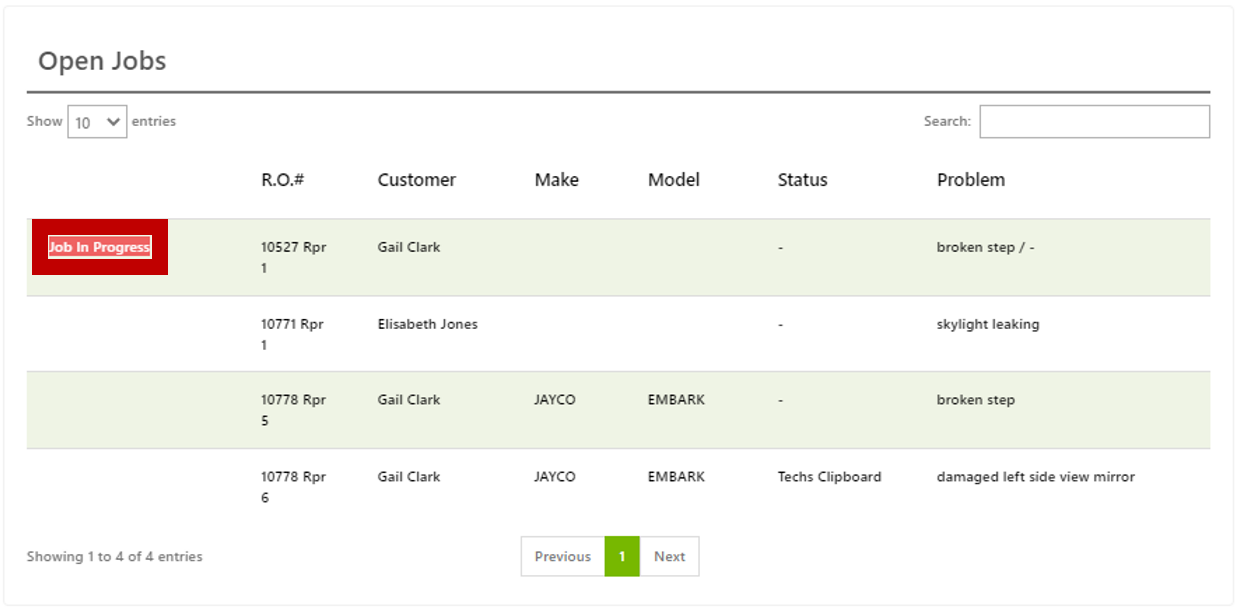
Job Details
The Job Details is the maintenance area of the App, which allows the Tech to Start, Stop, Save and Complete work. 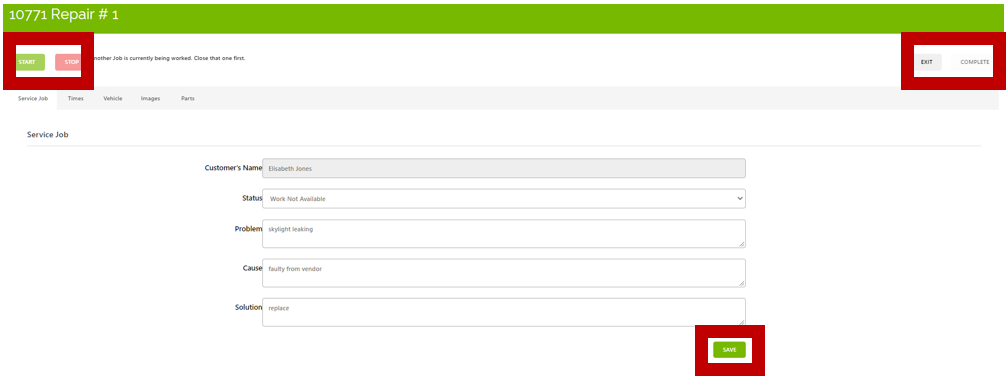
Start and Stop Buttons
The Start and Stop Buttons are used by the Tech to indicate when they start and stop working on an assigned job, only one job can be started at a time.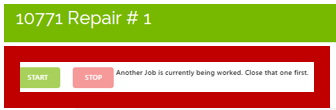
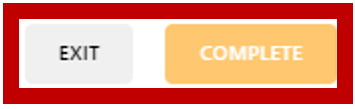
Complete Button
The Complete Button is used by the Tech to mark the job as completed, will remove it from the Open Jobs List, and update the Stats and Last Completed with the job information.
Exit button
The Exit Button will return you to the Dashboard.
There are five tabs of job detail for viewing and editing, Service Job, Times, Vehicle, Images and Parts.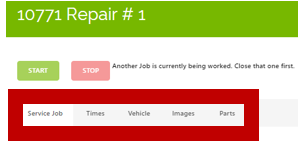
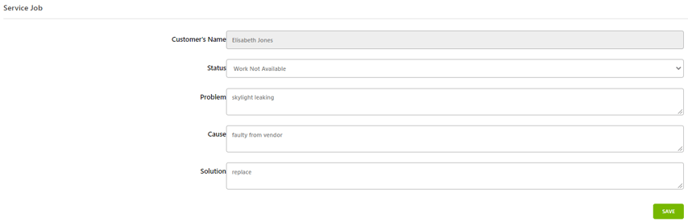
Service Job Tab
The Service Job Tab displays basic information about the job. The Tech can modify the Status, Problem, Cause and Solution.
Times Tab
The Times Tab displays the Start and Stop Times for the job selected.
Vehicle Tab
The Vehicle Tab displays basic information about the Vehicle attached to the Repair Order. The fields on this tab display in view only mode and are not editable. 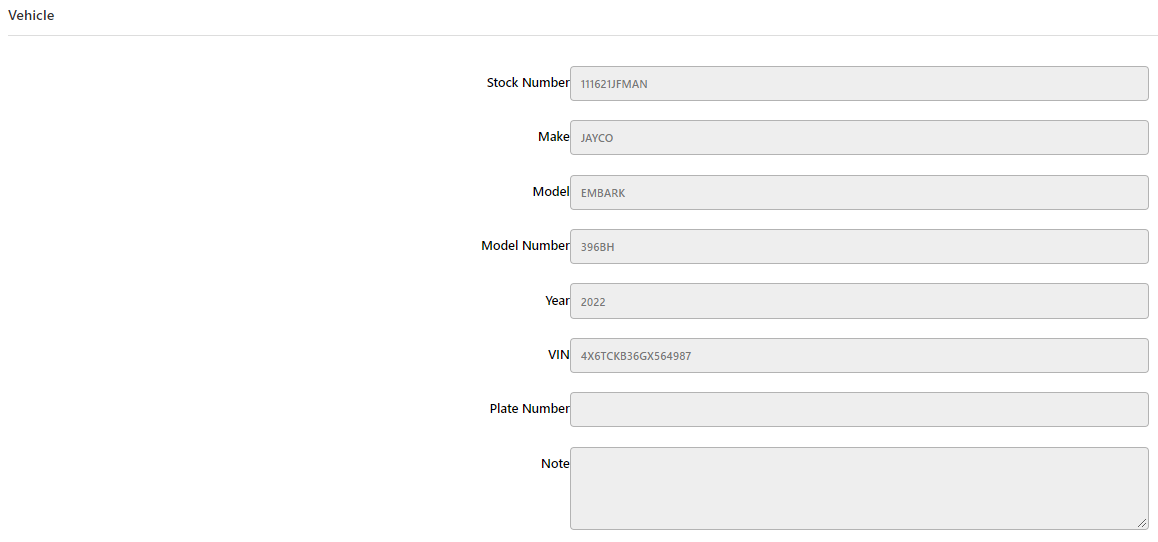
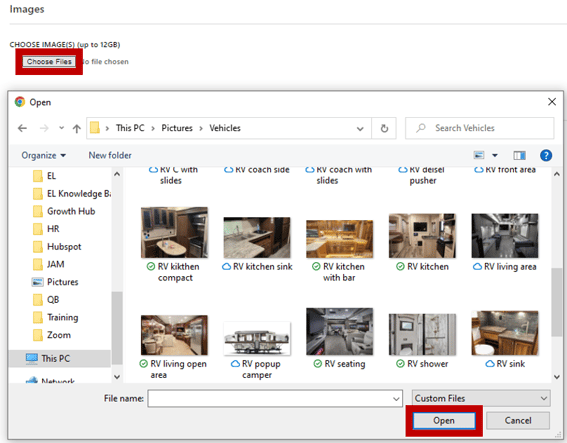
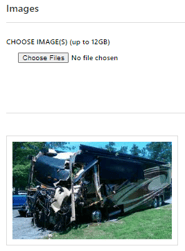
Images Tab
The Images Tab allows the Tech to upload / display pictures associated with the job. Click Choose Files to select the photos to be added to the job. If you are using a device with a camera, you will be prompted to take a picture or select a file. On devices with no camera the Open file dialog box will appear. After selecting and / or taking a picture, click Upload to add the picture. The pictures will display in a grid below the buttons.

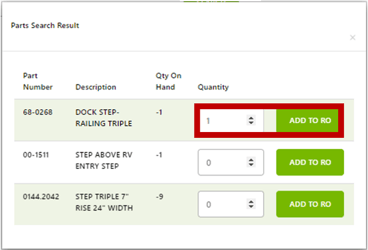
 Parts Tab
The Parts Tab displays parts associated with the job. The Tech can a search and add part(s) by keying the UPC, Part Number or Part Description.

Locate the part in the Part Search Result Box, enter your quantity and click Add to RO.