
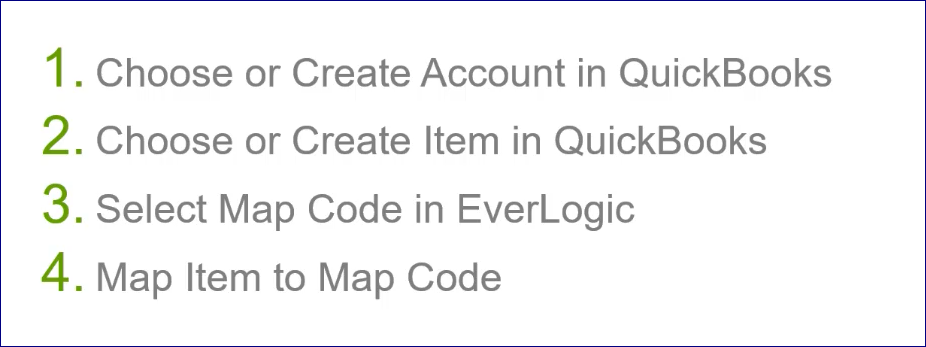
This article outlines General Steps for Mapping. Anytime a new item is added, ie new payment type, product, tax or fee. You must create and map item in QuickBooks first, then in EverLogic.
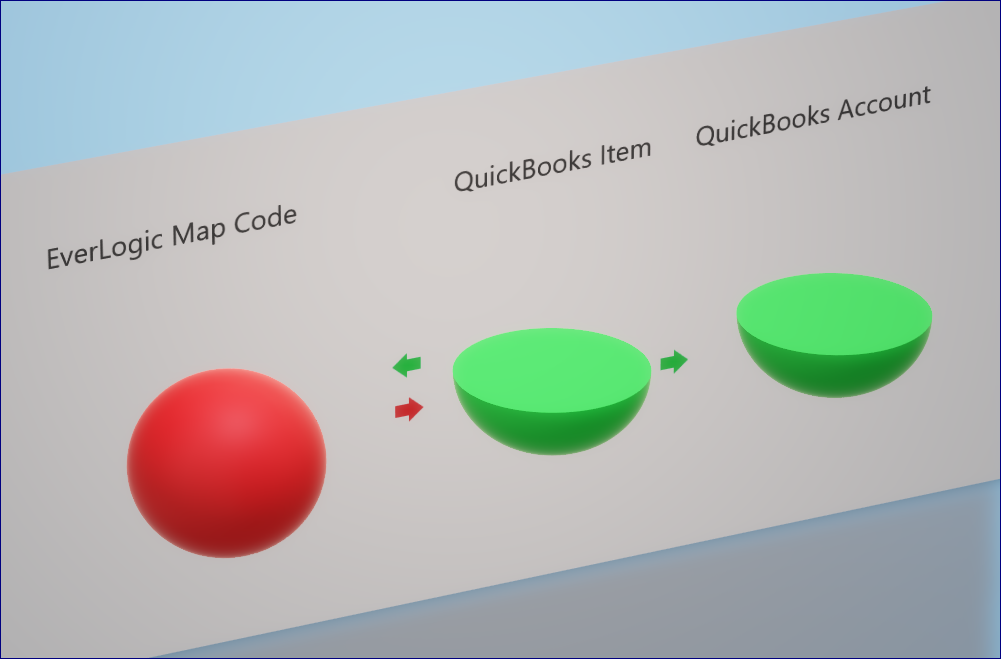
The illustration below shows how your daily transactions in EverLogic are integrated in QuickBooks. This information streams from the EverLogic Map Code to the QuickBooks Item set in the Map Code, which is tied to the QuickBooks Account. Think of it as a long "if then" statement, "if this, then that" repeated over a bunch of times. It is helpful to keep this illustration in mind when navigating this process.
The following steps will help you achieve your goal.
IMPORTANT: EverLogic can be mapped to QuickBooks Online or Desktop versions.
-
- QuickBooks Online - minimum requirement of Plus or higher
- QuickBooks Desktop - requires Pro Edition or better
REMINDER: If you are using QuickBooks Desktop, be sure to have it open on the workstation to map EverLogic to QuickBooks and anytime you transmit data to QuickBooks from EverLogic.
Mapping in QuickBooks
1. Identify what needs to be mapped and determine what QuickBooks Account will be impacted, consider the questions below;
-
- Is it a payment type or a new or used inventory item or a new back-end product or a type of labor?
- What do you want the funds for this item to be given to or taken from within the Chart of Accounts?
- Which account will be increased or decreased within the Chart of Accounts?
- Is this an Expense related to the product? Is this a form of Income? Can this be categorized as an asset for the company?
IMPORTANT: If you are not sure which account to use, please contact your Accountant, your CPA, or the EverLogic Virtual CFO for assistance.
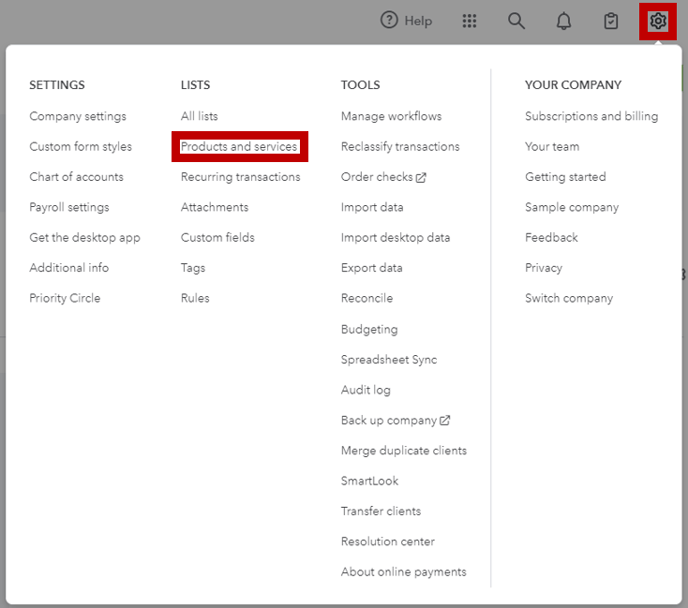
2. Go to the Gear Icon in top-right corner and select Products and Services
3. Click New to create a new Item
REQUIRED: Use the steps below to create three Accounts, Asset Account, Income Account and COGS Account.

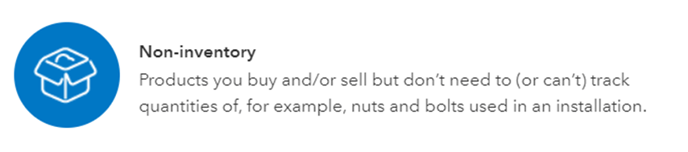
4. Select Non-inventory Option
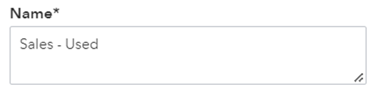
5. Key the name of the Item in the Name Field
IMPORTANT: Be mindful of naming conventions. Follow these guidelines to organize the data better and promote a common language with EverLogic Support.
-
-
- Leading word
- Inventory = Asset
- Sales = Income
- COGS, Expense, Accrued Liability = Used in the COGS field
- Leading word
-
6. Select Income Account; choose the account within the Chart of Accounts the Item needs to link to
Note: A sub-account can also be selected.

7. Check-mark the Purchasing Information Box, to ensure anything related to this Item is directed to the accounts within the Chart of Accounts selected

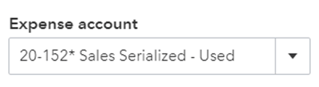
8. Select the Expense Account, choose the same option as the Income Account selected
Note: A sub-account can also be selected.
9. Save and Close
REMINDER: Create three Accounts, Asset Account, Income Account and COGS Account.
Mapping in EverLogic
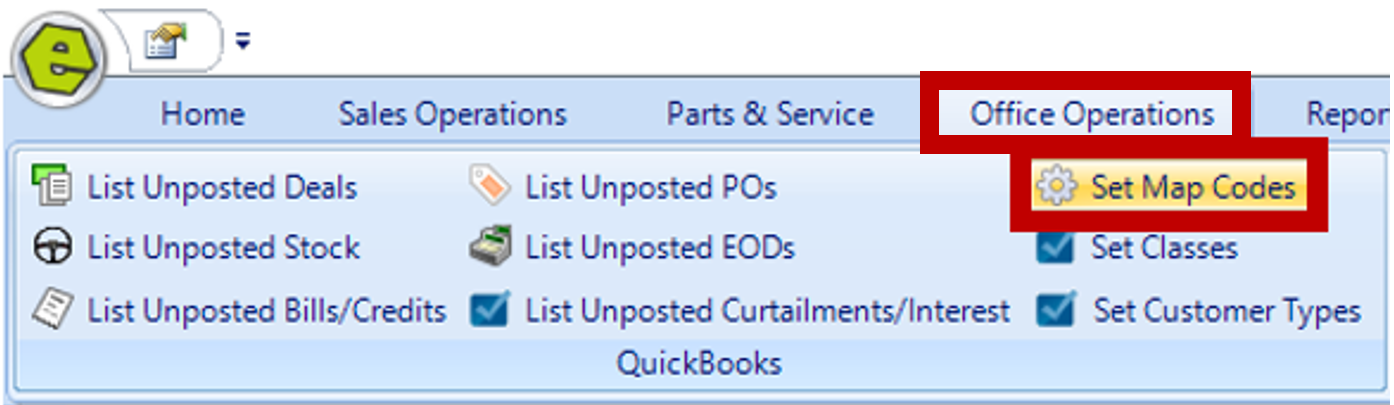
1. Navigate to the Office Operations Tab and select Set Map Codes
2. Click the plus symbol to the left of the line Item, to expand the list, locate the Item to map
TIP: Drag and drop the Found Where Button down into the grid area, to view all Map Codes in an alphabetical list. Different Map Codes related to the Item being mapped may exist in more that one line item.
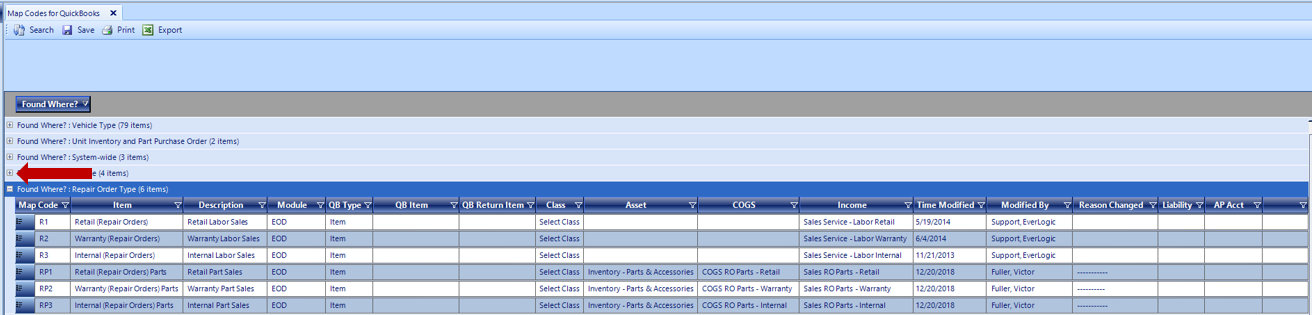
3. Click the drop-down arrow in the QuickBooks Item Column and fill-in the blanks, use the drop-down menus to select the QuickBooks Account, you need this Item mapped to
REQUIRED: Products require all three, Asset, Income and COGS Accounts, to function properly. The pop-up window may be different, based on the type of Item you are mapping.
 4. Click OK
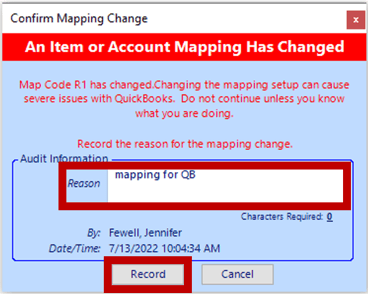
5. Type the Reason, at least a 10 characters, then click Record
 6. Click Save, the item is now mapped and will communicate with QuickBooks during posting

7. Log out of EverLogic to accept these changes
TIP: Test this mapping with the next EOD, which includes the newly mapped Item.
Related Articles:
Import the QuickBooks Chart of Accounts and Item List
Mapping Vehicle Type in QuickBooks
Import the QuickBooks Chart of Accounts and Item List
Part Categories: Item Level Mapping
List Unposted End of Day (EOD)
List Unposted Curtailments / Interest