Mapping Parts Inventory in QuickBooks
Any physical part or product sold to customers requires an Asset, Income and COGS account be created within QuickBooks to integrate with EverLogic.
IMPORTANT: Review the Chart of Accounts to identify the account(s) you will be using in your mapping of QuickBooks to EverLogic. If possible, it is good practice to use the existing accounts rather then creating a new COA account.
QuickBooks Steps
Set-up Asset
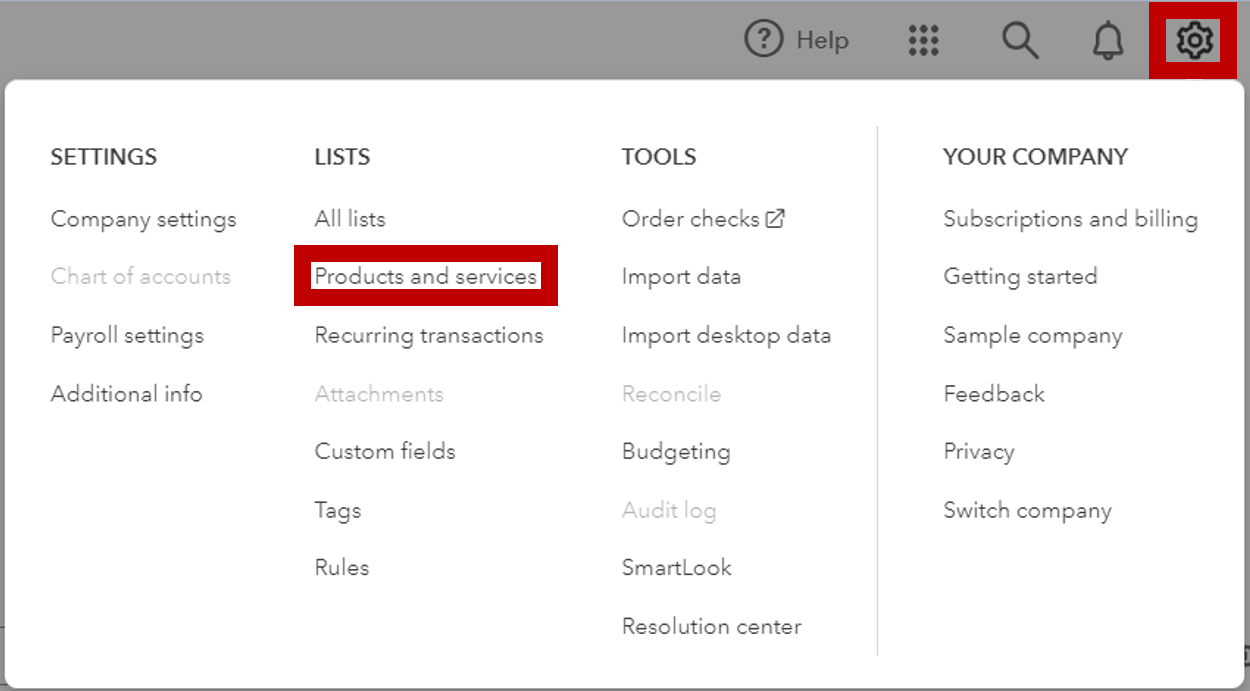
1. Access QuickBooks and click the Gear Icon for Settings
2. Select Products and services

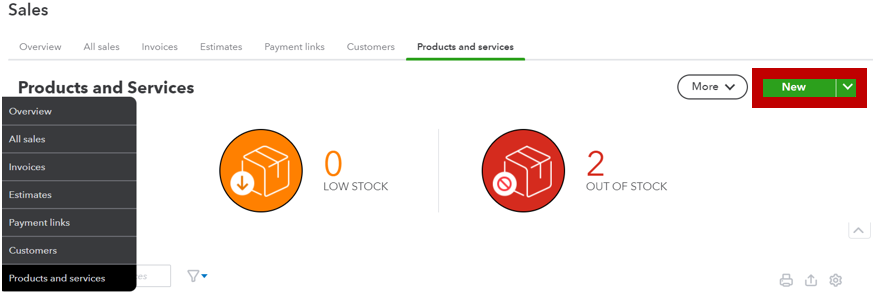
3. Click the New Button
4. Select Non-inventory Option
5. Key the name of the asset in the Name Field
IMPORTANT: Be mindful of naming conventions. Follow these guidelines to organize the data better and promote a common language with EverLogic Support.
-
-
- Leading word
- Inventory = Asset
- Sales = Income
- COGS, Expense, Accrued Liability = Used in the COGS field
- Leading word
-

6. Select Income Account; choose the account within the Chart of Accounts the Item needs to link to
Note: A sub-account can also be selected.

7. Check the checkbox for Purchasing Information

8. Select correct option from the Expense Account dropdown menu
Note: A sub-account can also be selected.

9. Click the Save and Close Button

Set-up COGS (Cost of Goods Sold)
1. Click the Gear Icon for Settings
2. Select Products and services

3. Click the New Button

4. Click the Non-inventory option

5. Key the name of the COGS in the Name Field
IMPORTANT: Be mindful of naming conventions. Follow these guidelines to organize the data better and promote a common language with EverLogic Support.
-
-
- Leading word
- Inventory = Asset
- Sales = Income
- COGS, Expense, Accrued Liability = Used in the COGS field
- Leading word
-

6. Select Income Account; choose the account within the Chart of Accounts the Item needs to link to
Note: A sub-account can also be selected.

7. Check the checkbox for Purchasing Information

8. Select correct option from the Expense Account dropdown menu
Note: A sub-account can also be selected.

9. Click the Save and Close Button

Set-up Income
1. Click the Gear Icon for Settings
2. Select Products and services

3. Click the New Button
4. Select Non-inventory Option
5. Key the name of the Income in the Name Field
IMPORTANT: Be mindful of naming conventions. Follow these guidelines to organize the data better and promote a common language with EverLogic Support.
-
-
- Leading word
- Inventory = Asset
- Sales = Income
- COGS, Expense, Accrued Liability = Used in the COGS field
- Leading word
-

6. Select Income Account; choose the account within the Chart of Accounts the Item needs to link to
Note: A sub-account can also be selected.

7. Check the checkbox for Purchasing Information

8. Select correct option from the Expense Account dropdown menu
Note: A sub-account can also be selected.

9. Click the Save and Close Button

EverLogic Steps
Confirm Mapping
1. Navigate to the Office Operations Tabs and select Set Map Codes 2. Locate the Item and click the drop-down arrow in the QuickBooks Item Column

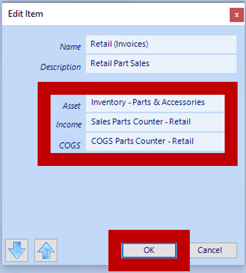
3. Fill-in the blanks, use the drop-down menus to select the QuickBooks Account, you need this Item mapped to
REQUIRED: Products require all three, Asset, Income and COGS Accounts, to function properly. The pop-up window may be different, based on the type of Item you are mapping.
4. Click OK

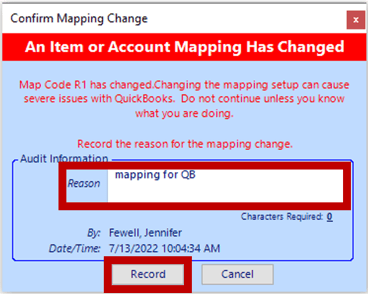
5. Type the Reason, at least a 10 characters, then click Record
 6. Click Save, the item is now mapped and will communicate with QuickBooks during posting

7. Log out of EverLogic to accept these changes
For additional help on mapping to QuickBooks, check out this video below:
Related Articles:
New Vehicle Purchase Order Form (Multi-Unit Ordering)
Adding PAC as a Default to Vehicles
Enter Floor Plan Balance on a Unit
How to Change the Floor Plan Starting Balance of Unit Inventory
Import the QuickBooks Chart of Accounts and Item List
Mapping from EverLogic to QuickBooks